

Leica SL3, SL3-S, and SL3-P Complete Setup Guide
An in-depth look at setting up your camera for success

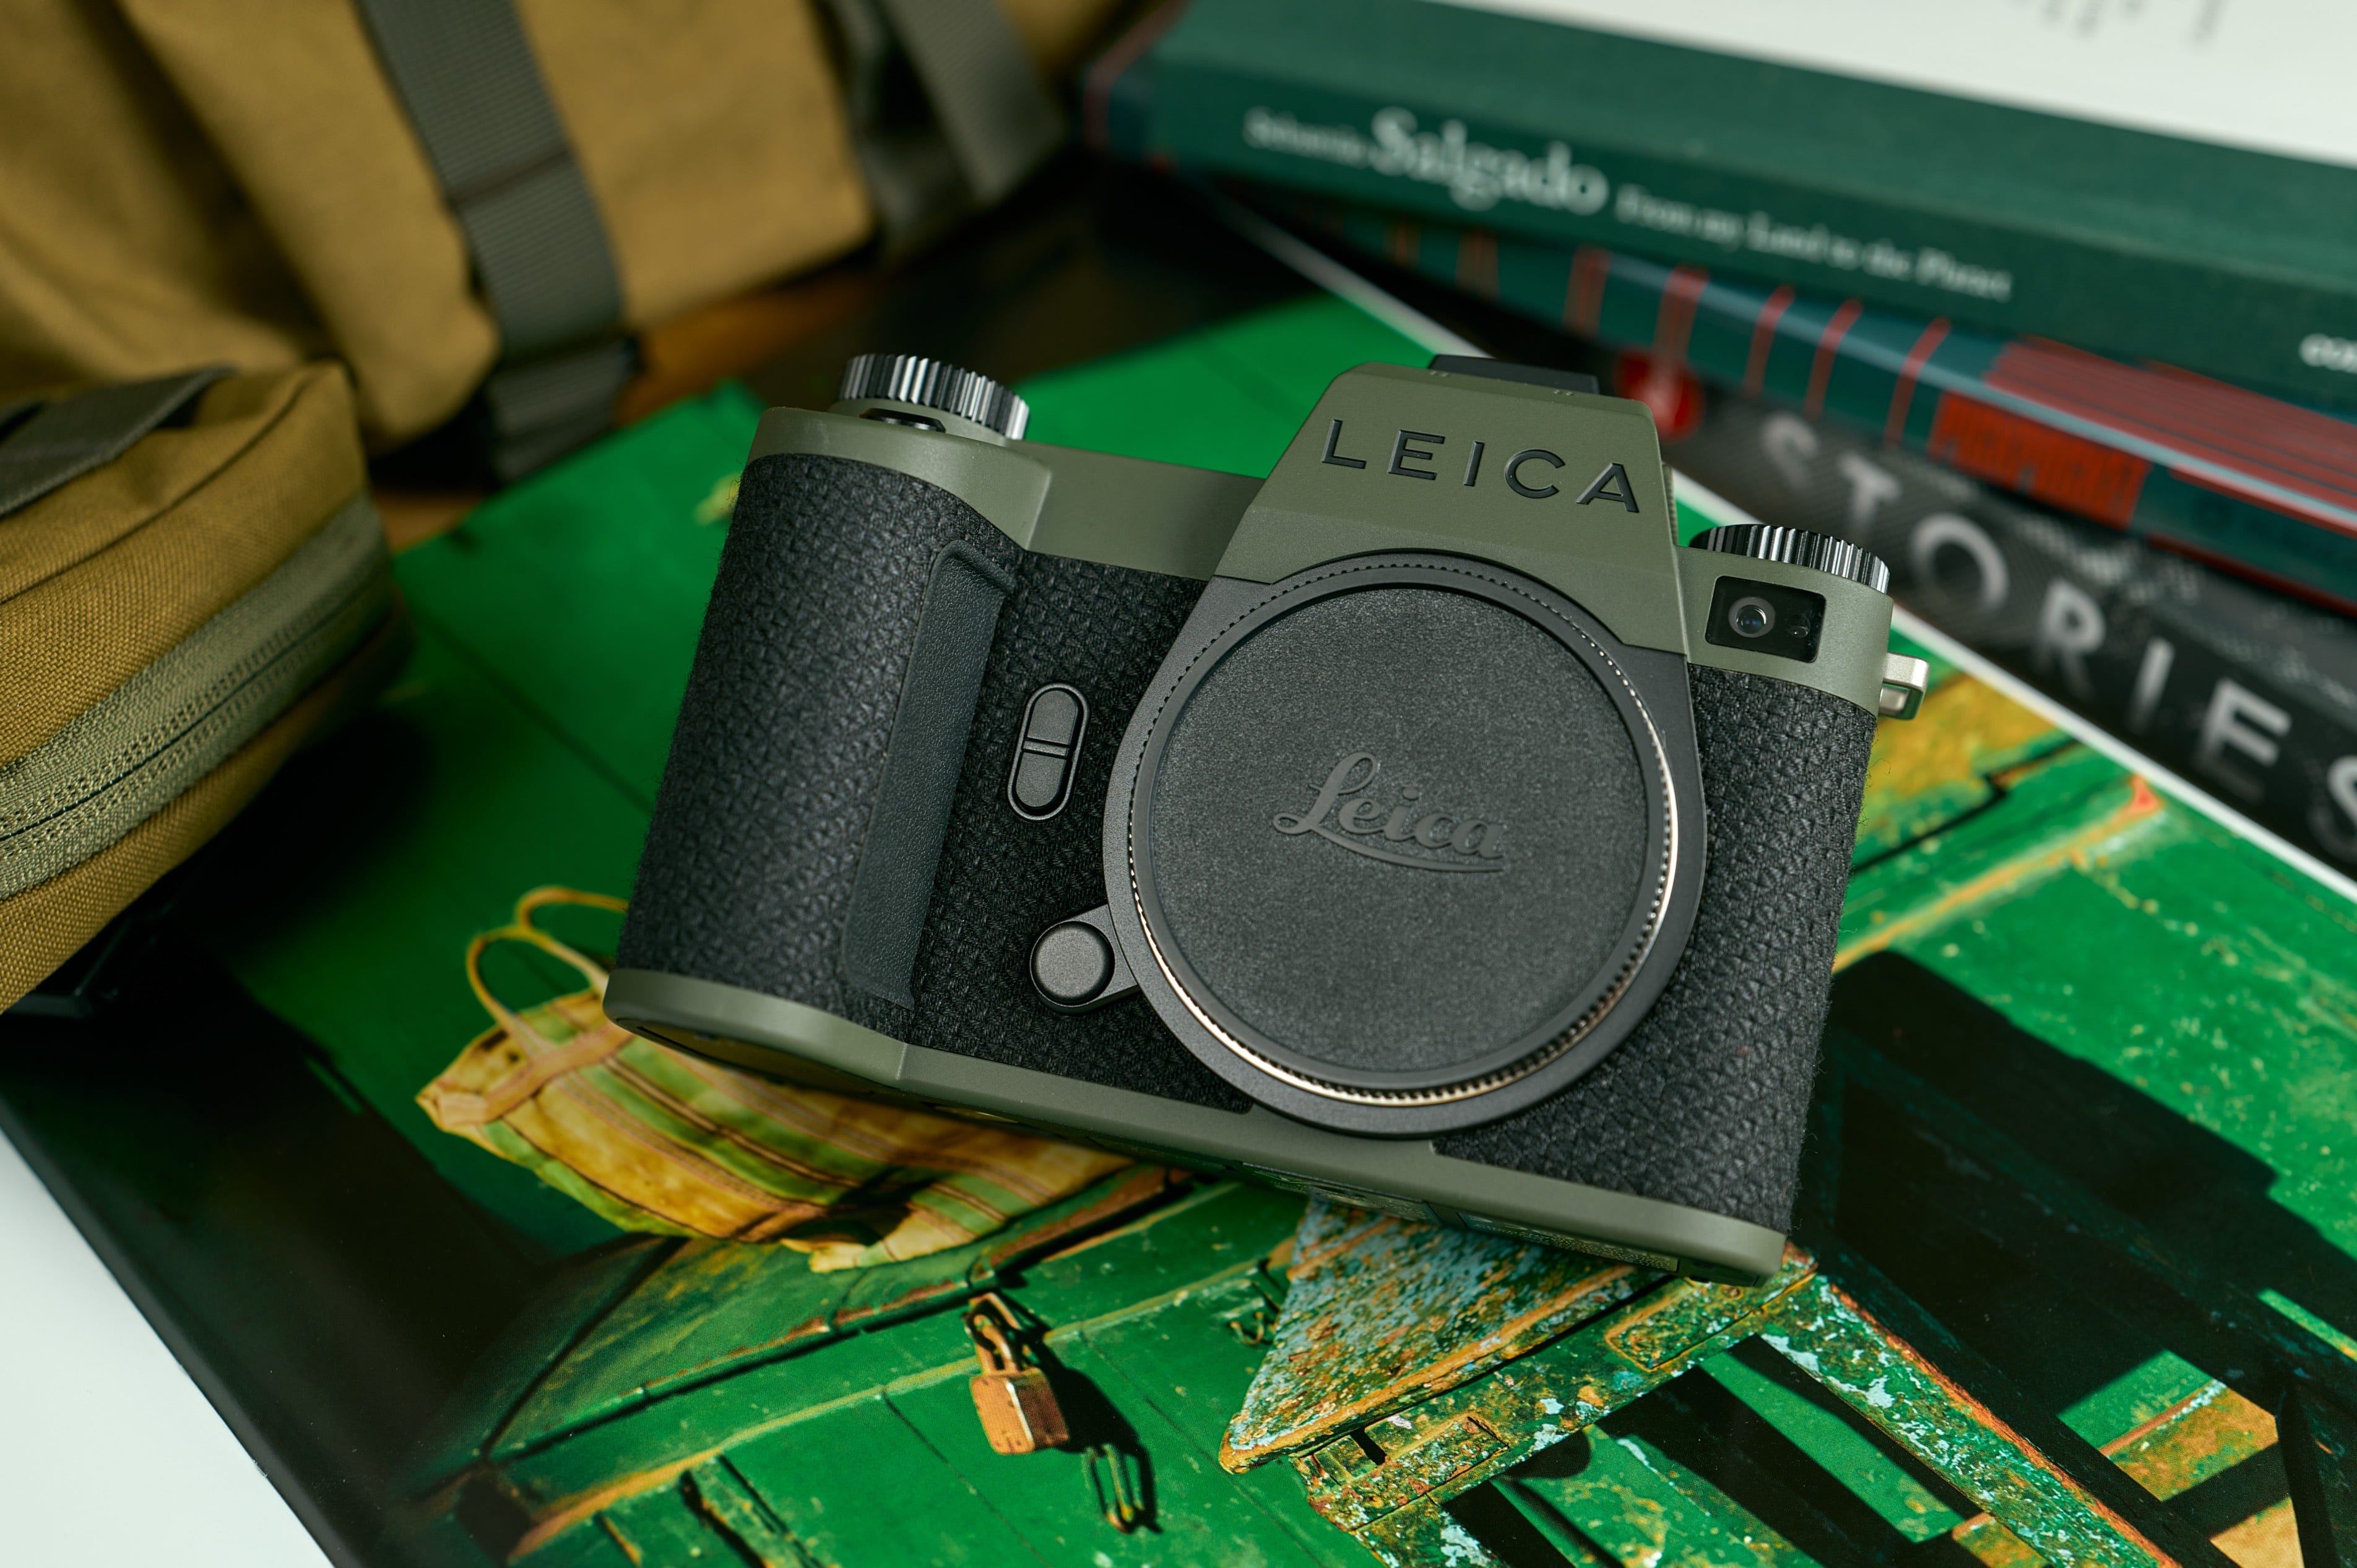
The Leica SL3 and SL3-S are powerhouses, but they truly sing once they’re tuned to the way you actually shoot. I’ve designed this guide to get you up and running faster by stripping away the trial and error process, and giving you a framework that can adapt to any situation.
Now, before we start remapping buttons, make sure your camera is synced to the Leica FOTOS App on your smartphone and updated to firmware 4.00 or later. Technology moves fast, so I’ll be updating this guide annually to reflect new firmware and my own evolving best practices. Bookmark this page, check back often, and let’s get your gear sorted.
Function Buttons
Leica cameras have earned a reputation for being clean, modern instruments for photography. Part of that comes from how little text is plastered around the body. It’s minimalism by design. Which makes button remapping less conflating.
On any new camera, once it’s been synced and updated, I’ll look to customize the individual function buttons. To do this, you just need to hold down any one of the seven Custom Fn Buttons for a couple seconds and choose the setting that best suits your style. This is how I’ve set up my layout:
Top Left Fn: AF Frame Size to adjust my focus area size
Top Right Fn: AF Mode to change my focus area type
Front Top Fn: Dial Lock to mitigate accidental changes
Front Bottom Fn: Toggle AF to quickly engage manual focus
Back Centre Fn: Toggle AF Point to move my focus point to the centre
Thumb Wheel Fn: Magnification to better focus on a scene
Fn Button: Toggle Info Levels to change between Info Profiles
At the moment, this is how I have my buttons mapped for the work I do. As you can see, it’s largely around tuning my autofocus experience exactly for the environment I’m in. The SL cameras have come a long way with respect to autofocus and to ensure I’m getting the best performance, I’ll always make adjustments that best compliment my subject.
Should a specific environment require a different workflow, I’ll change the function buttons on the top of the camera, save it to a profile, and then change it back when I’m done shooting. It’s about making the tool responsive to your specific needs.
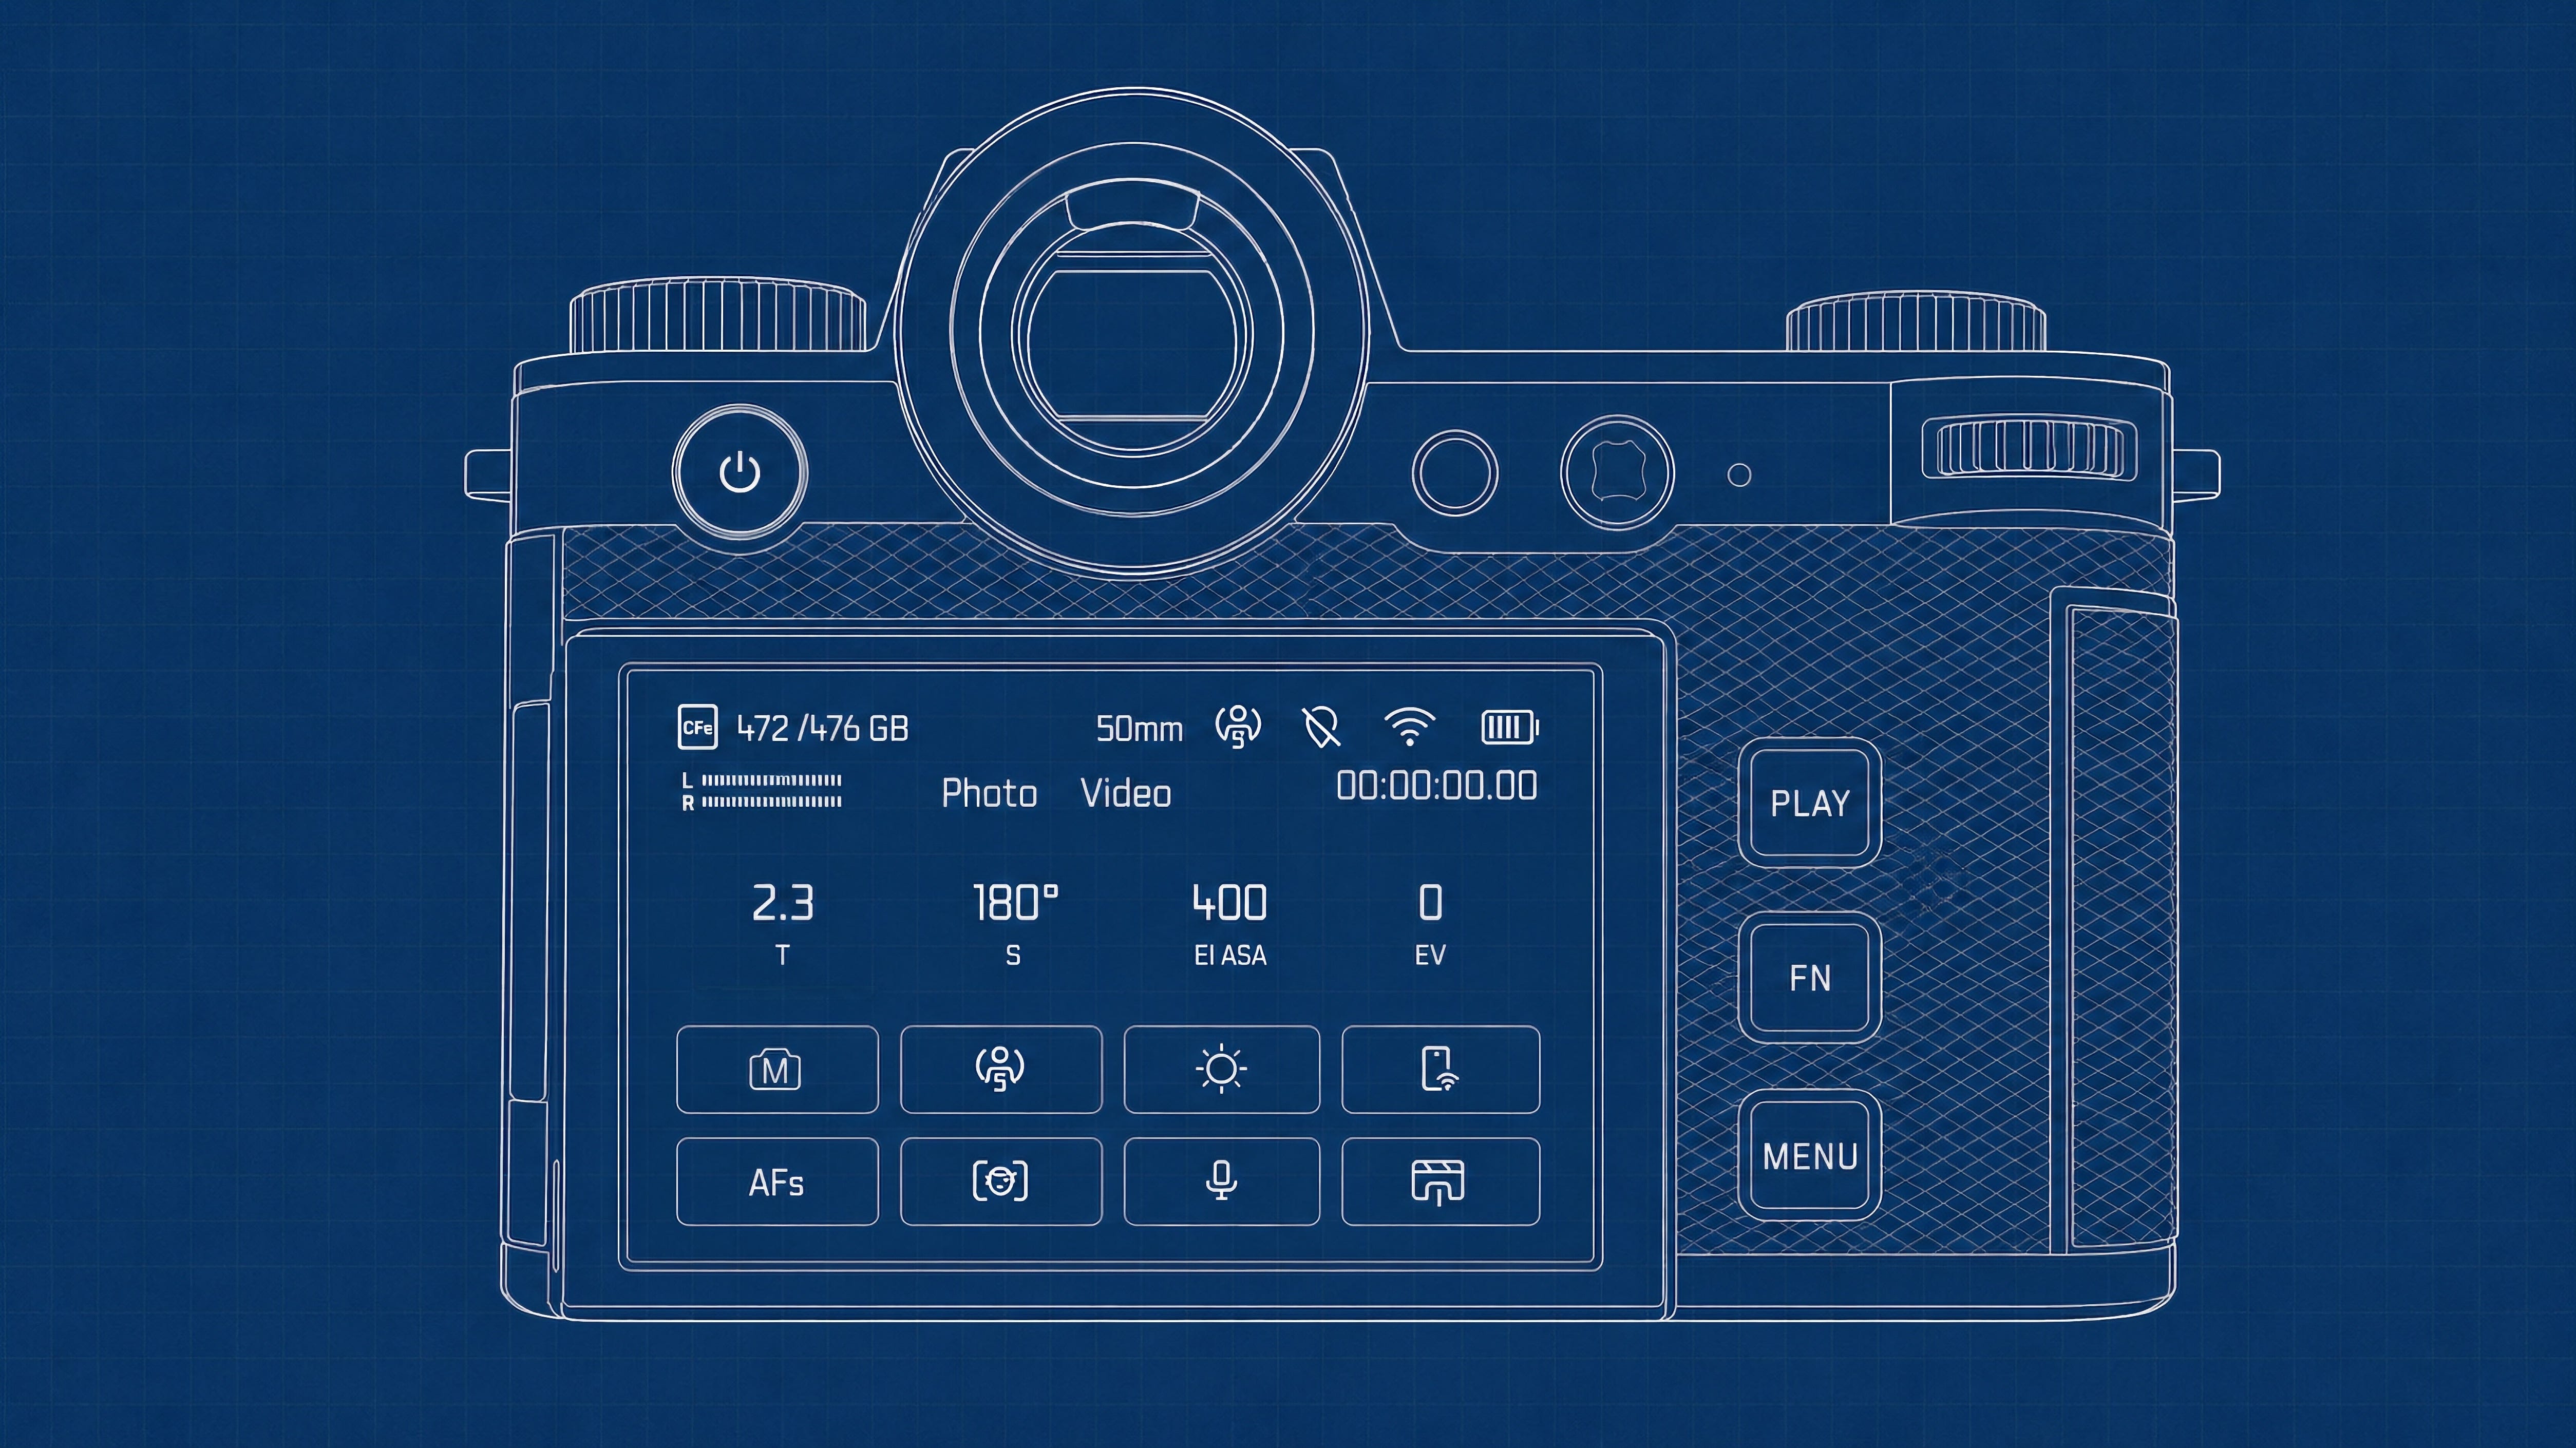
Control Center
Next, I’ll look to customize the Control Center. It’s the primary touch interface that pops up the moment you hit the MENU button.
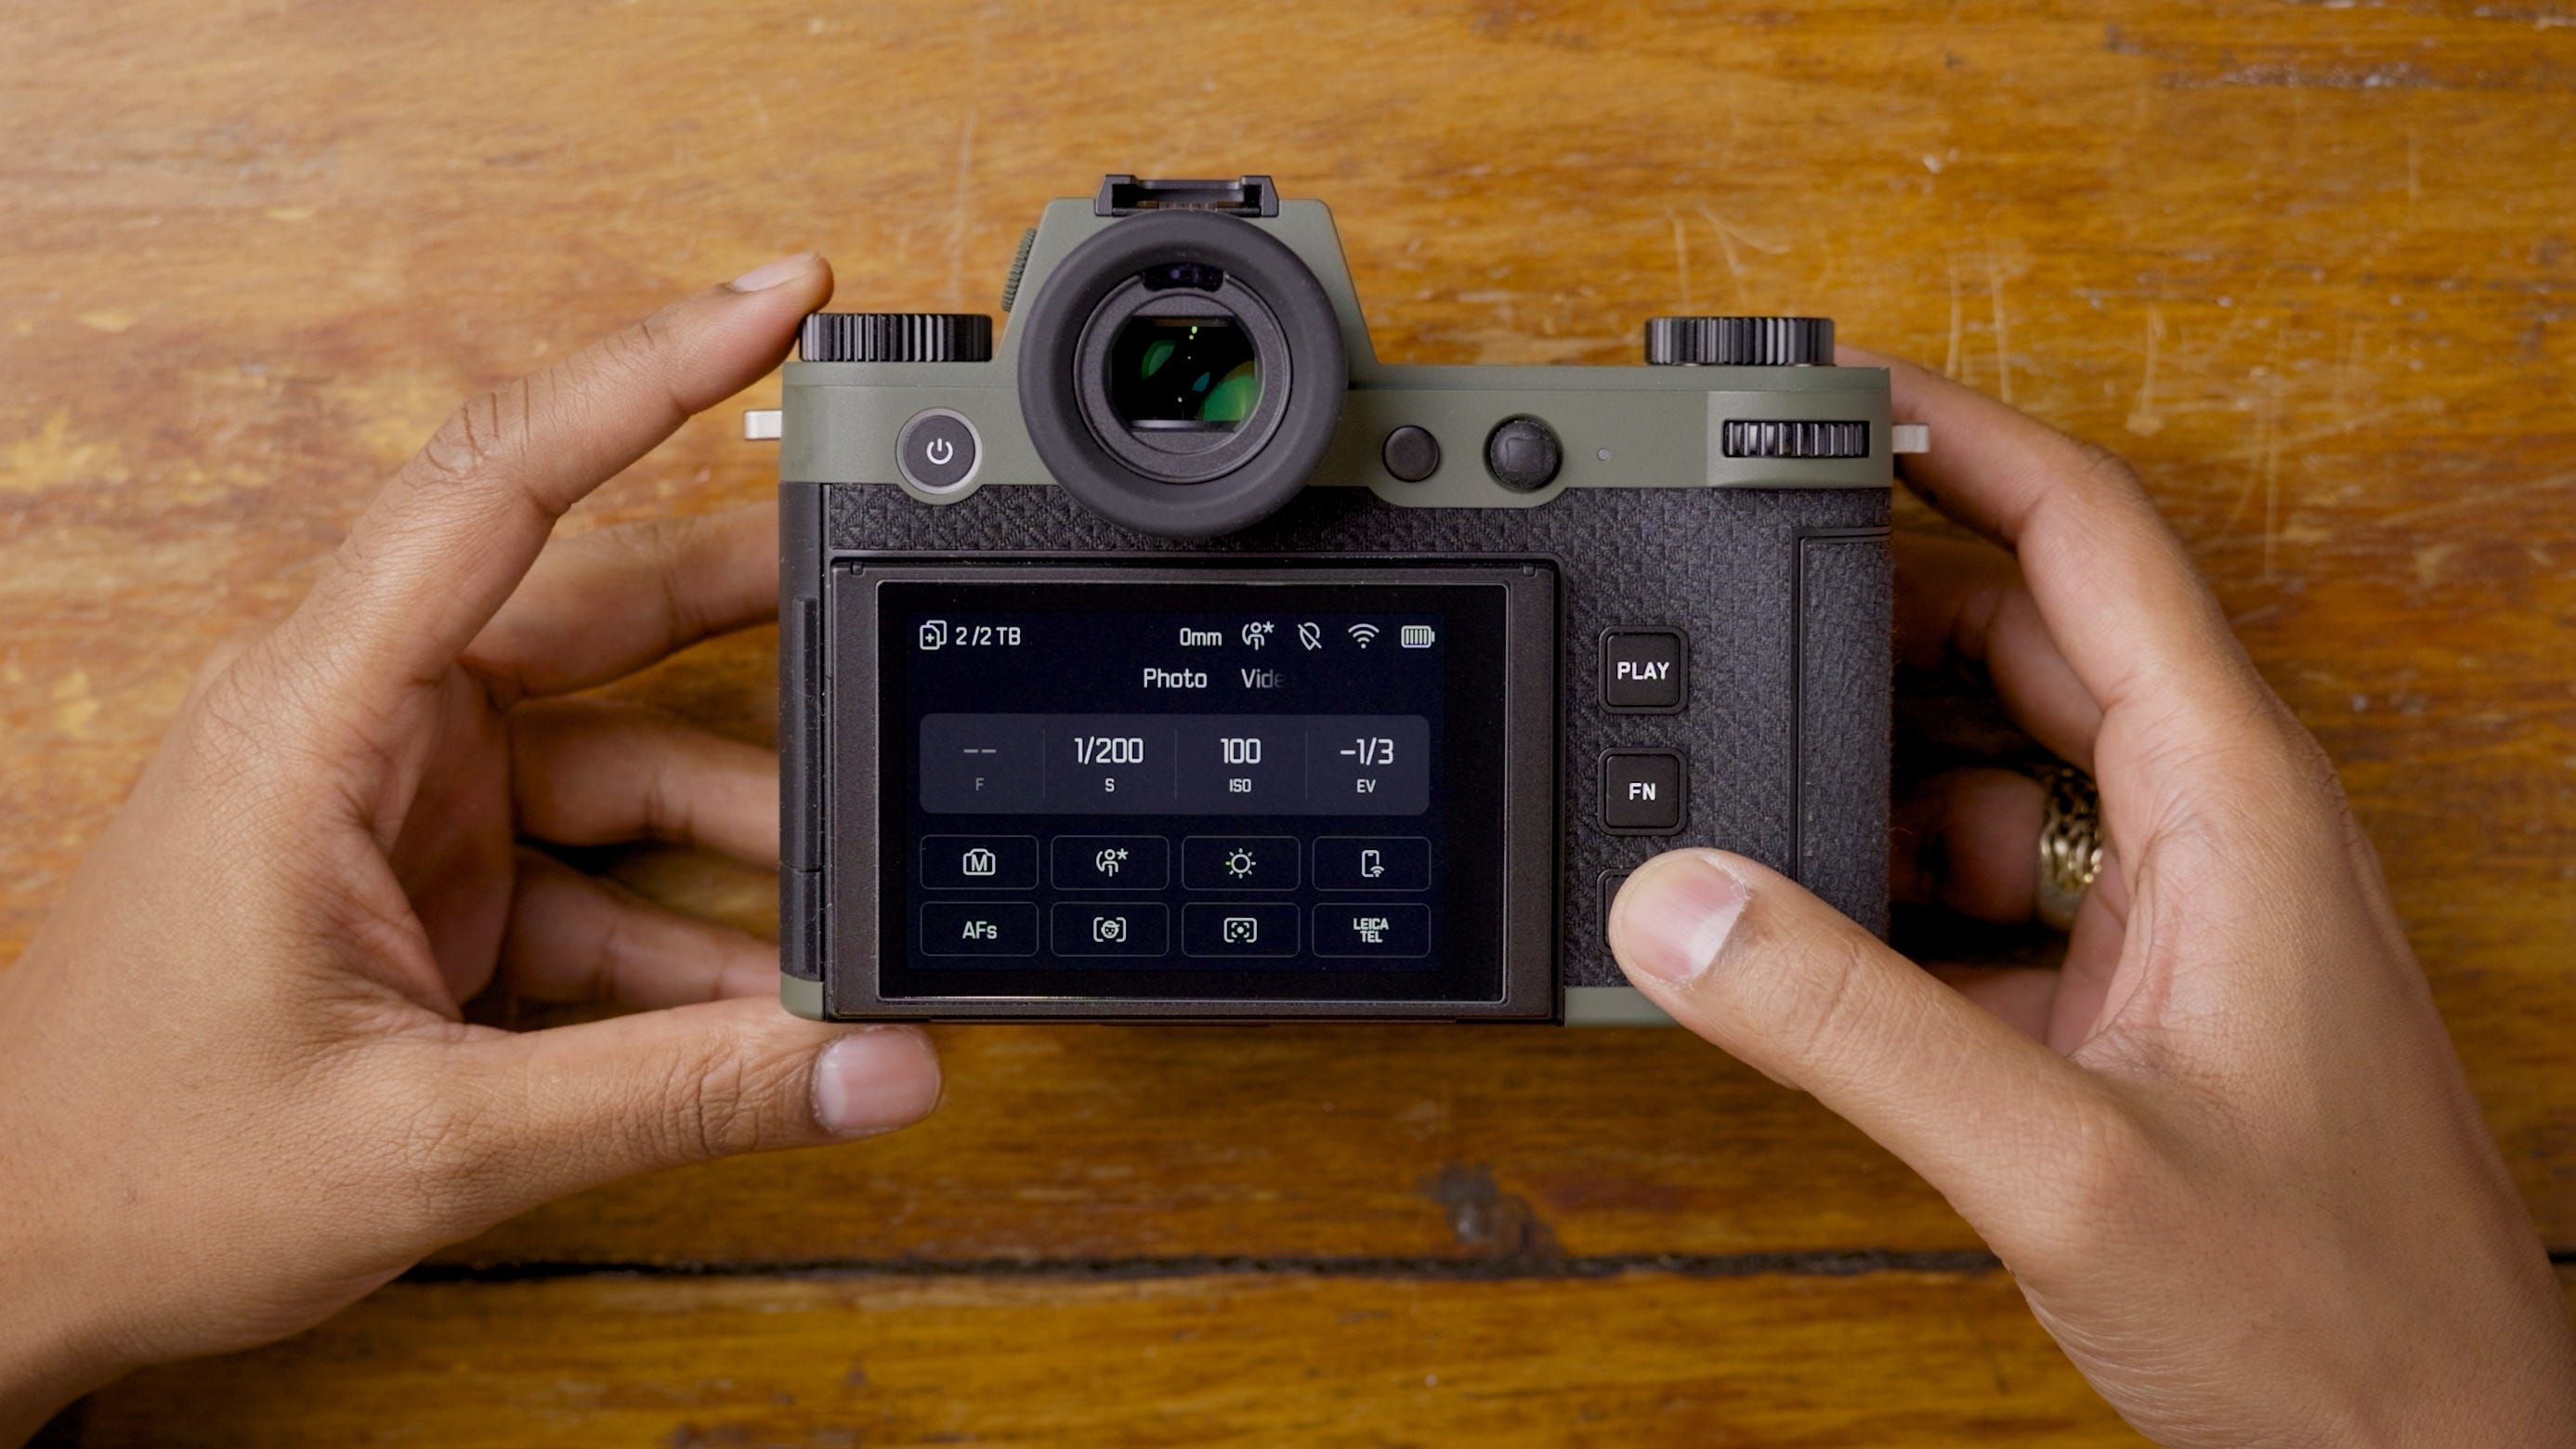
You’ll find eight tiles here. Just press and hold any of them to map a new function. Moving from left to right, top to bottom, these are the functions I’ve assigned for PHOTO MODE:
Exposure Mode: moving between manual or aperture priority
User Profiles: choosing the best custom profile for my environment
White Balance: selecting the best WB for my environment
Connectivity: smartphone sync or file uploads
Focus Mode: toggle between single or continuous autofocus
AF Profiles/Setup: choosing speed and sensitivity of autofocus
Exposure Metering: selecting the metering for a specific scene
Leica Looks: selecting a Look for my in-field preview
While my physical function buttons mostly handle binary toggles, these tiles offer a deeper menu of options to suit the surroundings. Later, I’ll show you how I’ve set these for VIDEO MODE.
Joystick & Dials
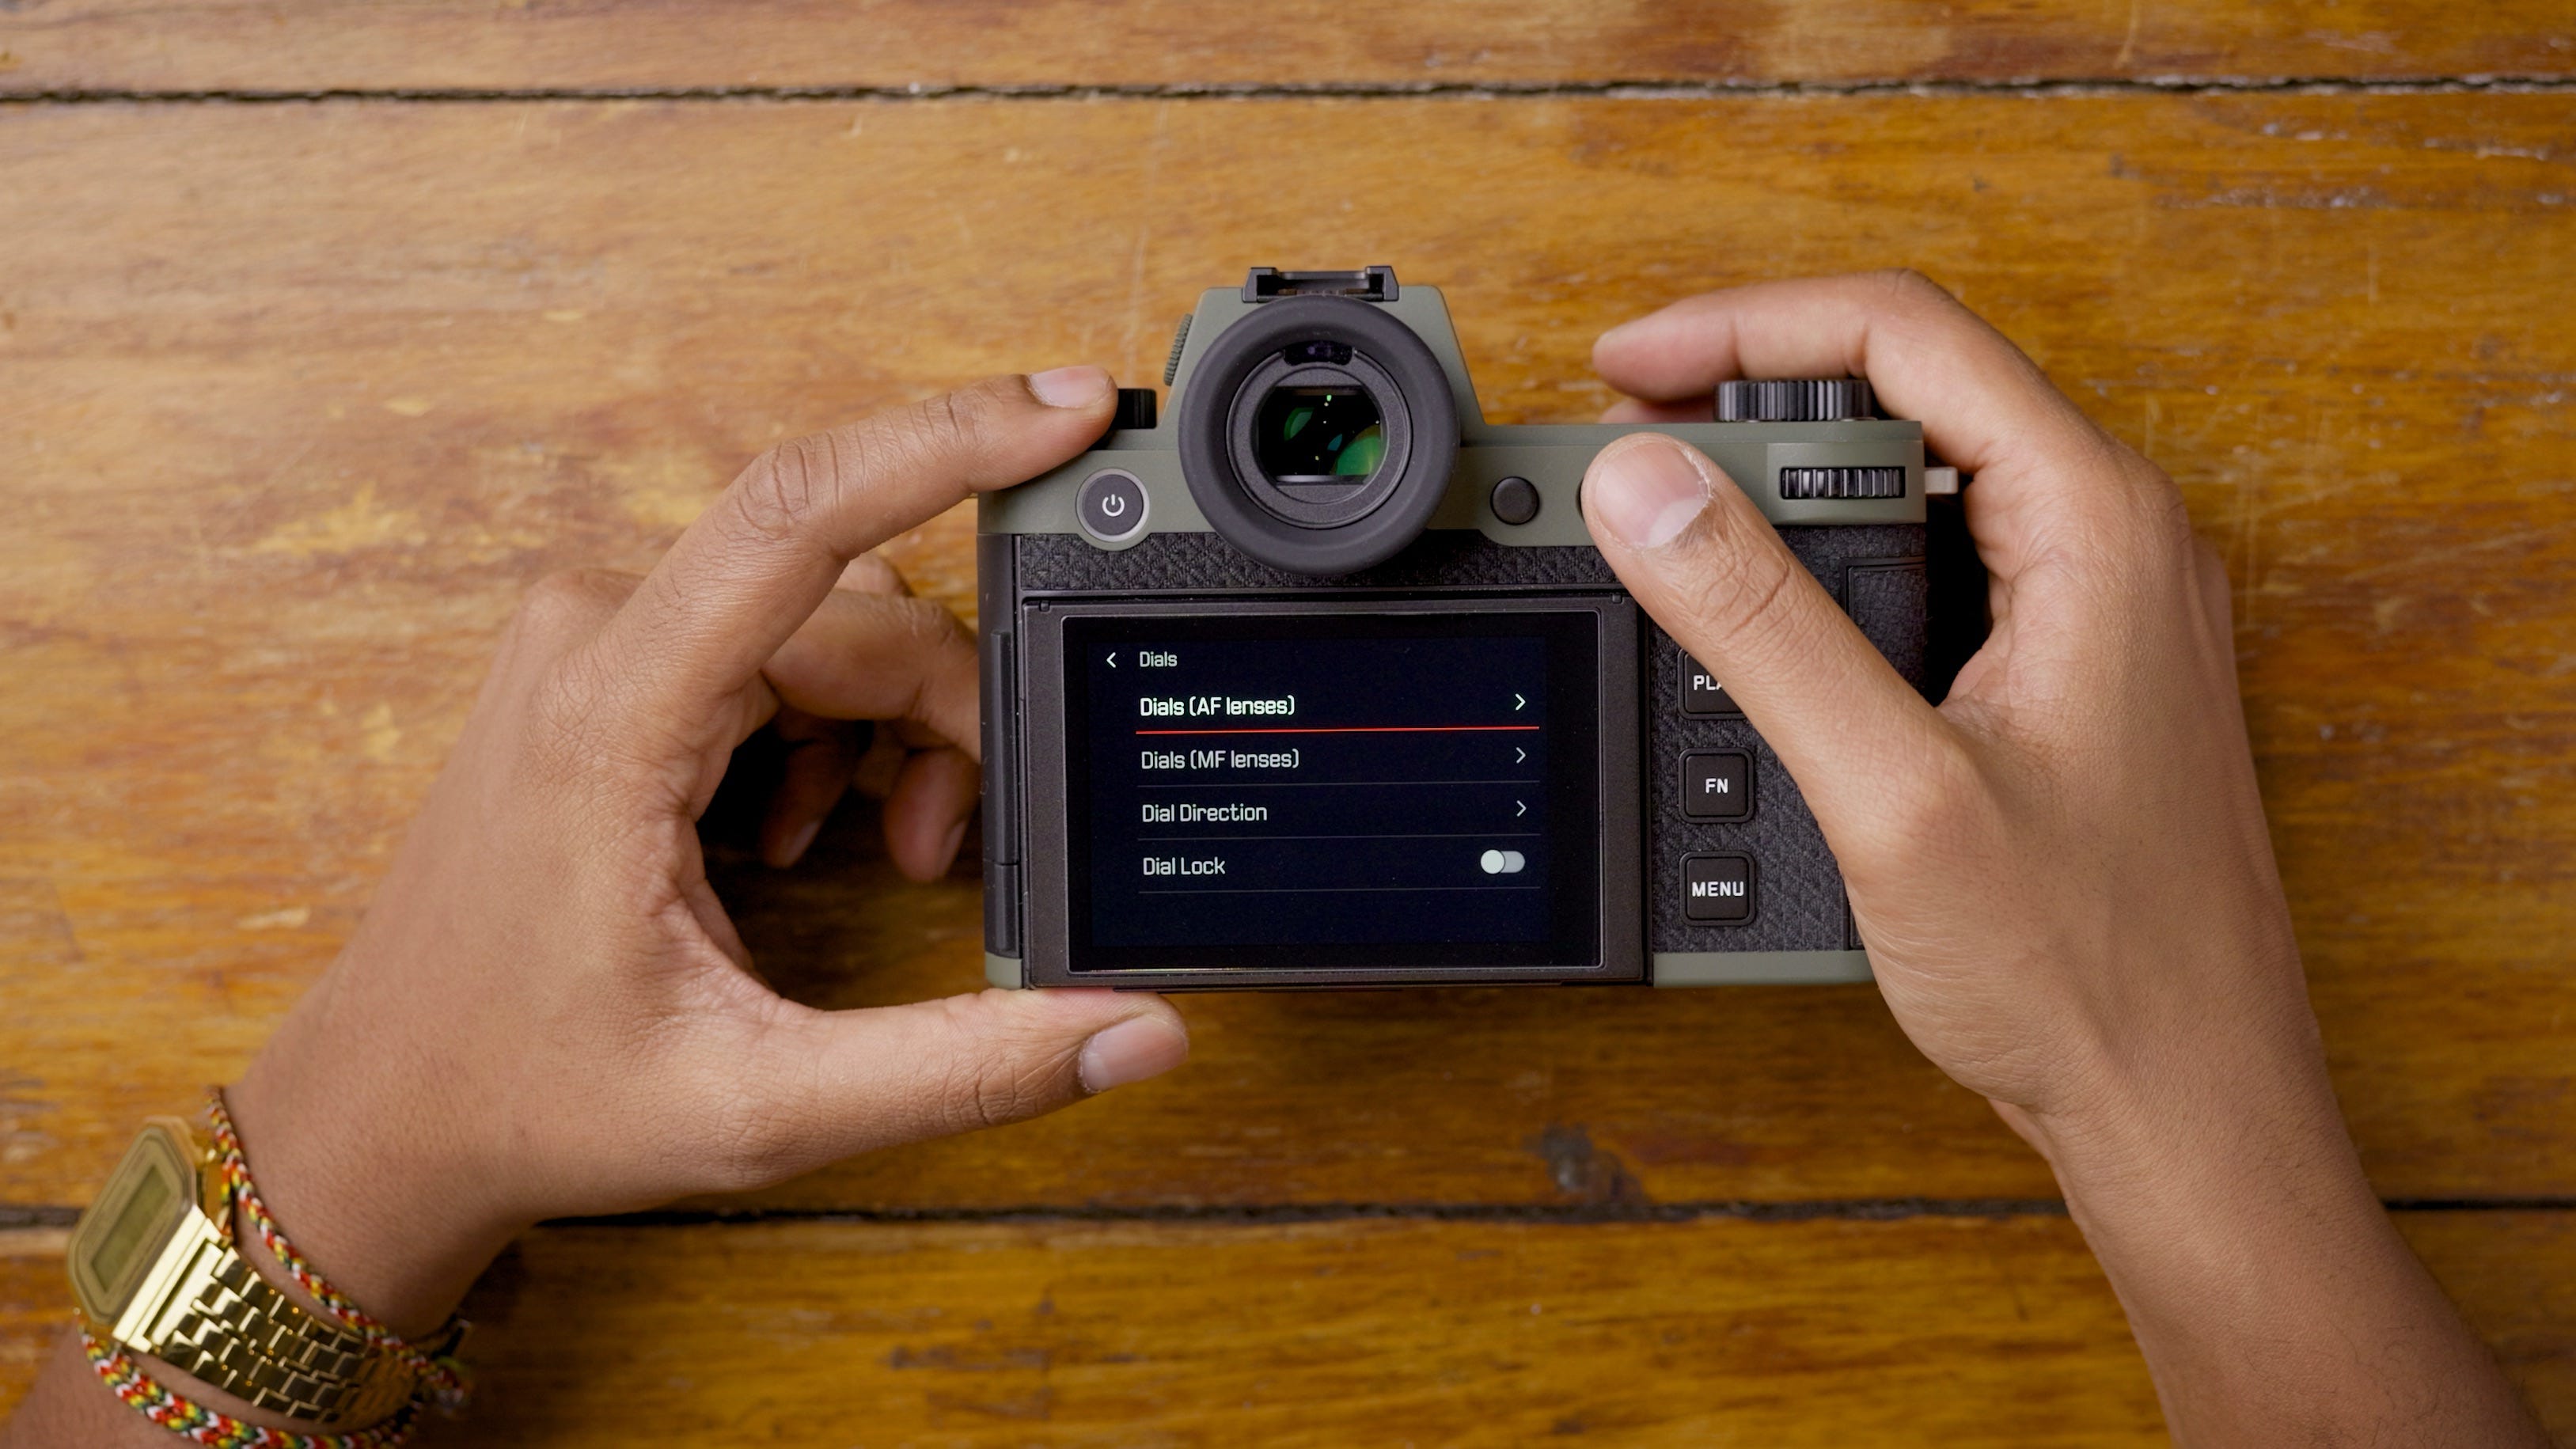
In the Customize Control menu, you can tweak exactly how the dials and joystick behave. This is the logic behind my layout:
Thumb Wheel: Aperture adjustment with counter-clockwise rotation. This mimics the physical experience of rotating an aperture ring on an M lens from the bottom.
Right Dial: Shutter speed adjustment with counter-clockwise rotation because turning the dial ‘back’ for a slower shutter makes sense, like time travel.
Left Dial: ISO control with clockwise rotation, similar to how a gain knob would work.
Joystick: AE-L in the CLICK mode so I can press and lock the exposure of any given scene.
After years with the SL system, this is the configuration that’s wired itself into my muscle memory. While others may champion an alternative setup, I prefer the correct way ;)
Capture Assistants
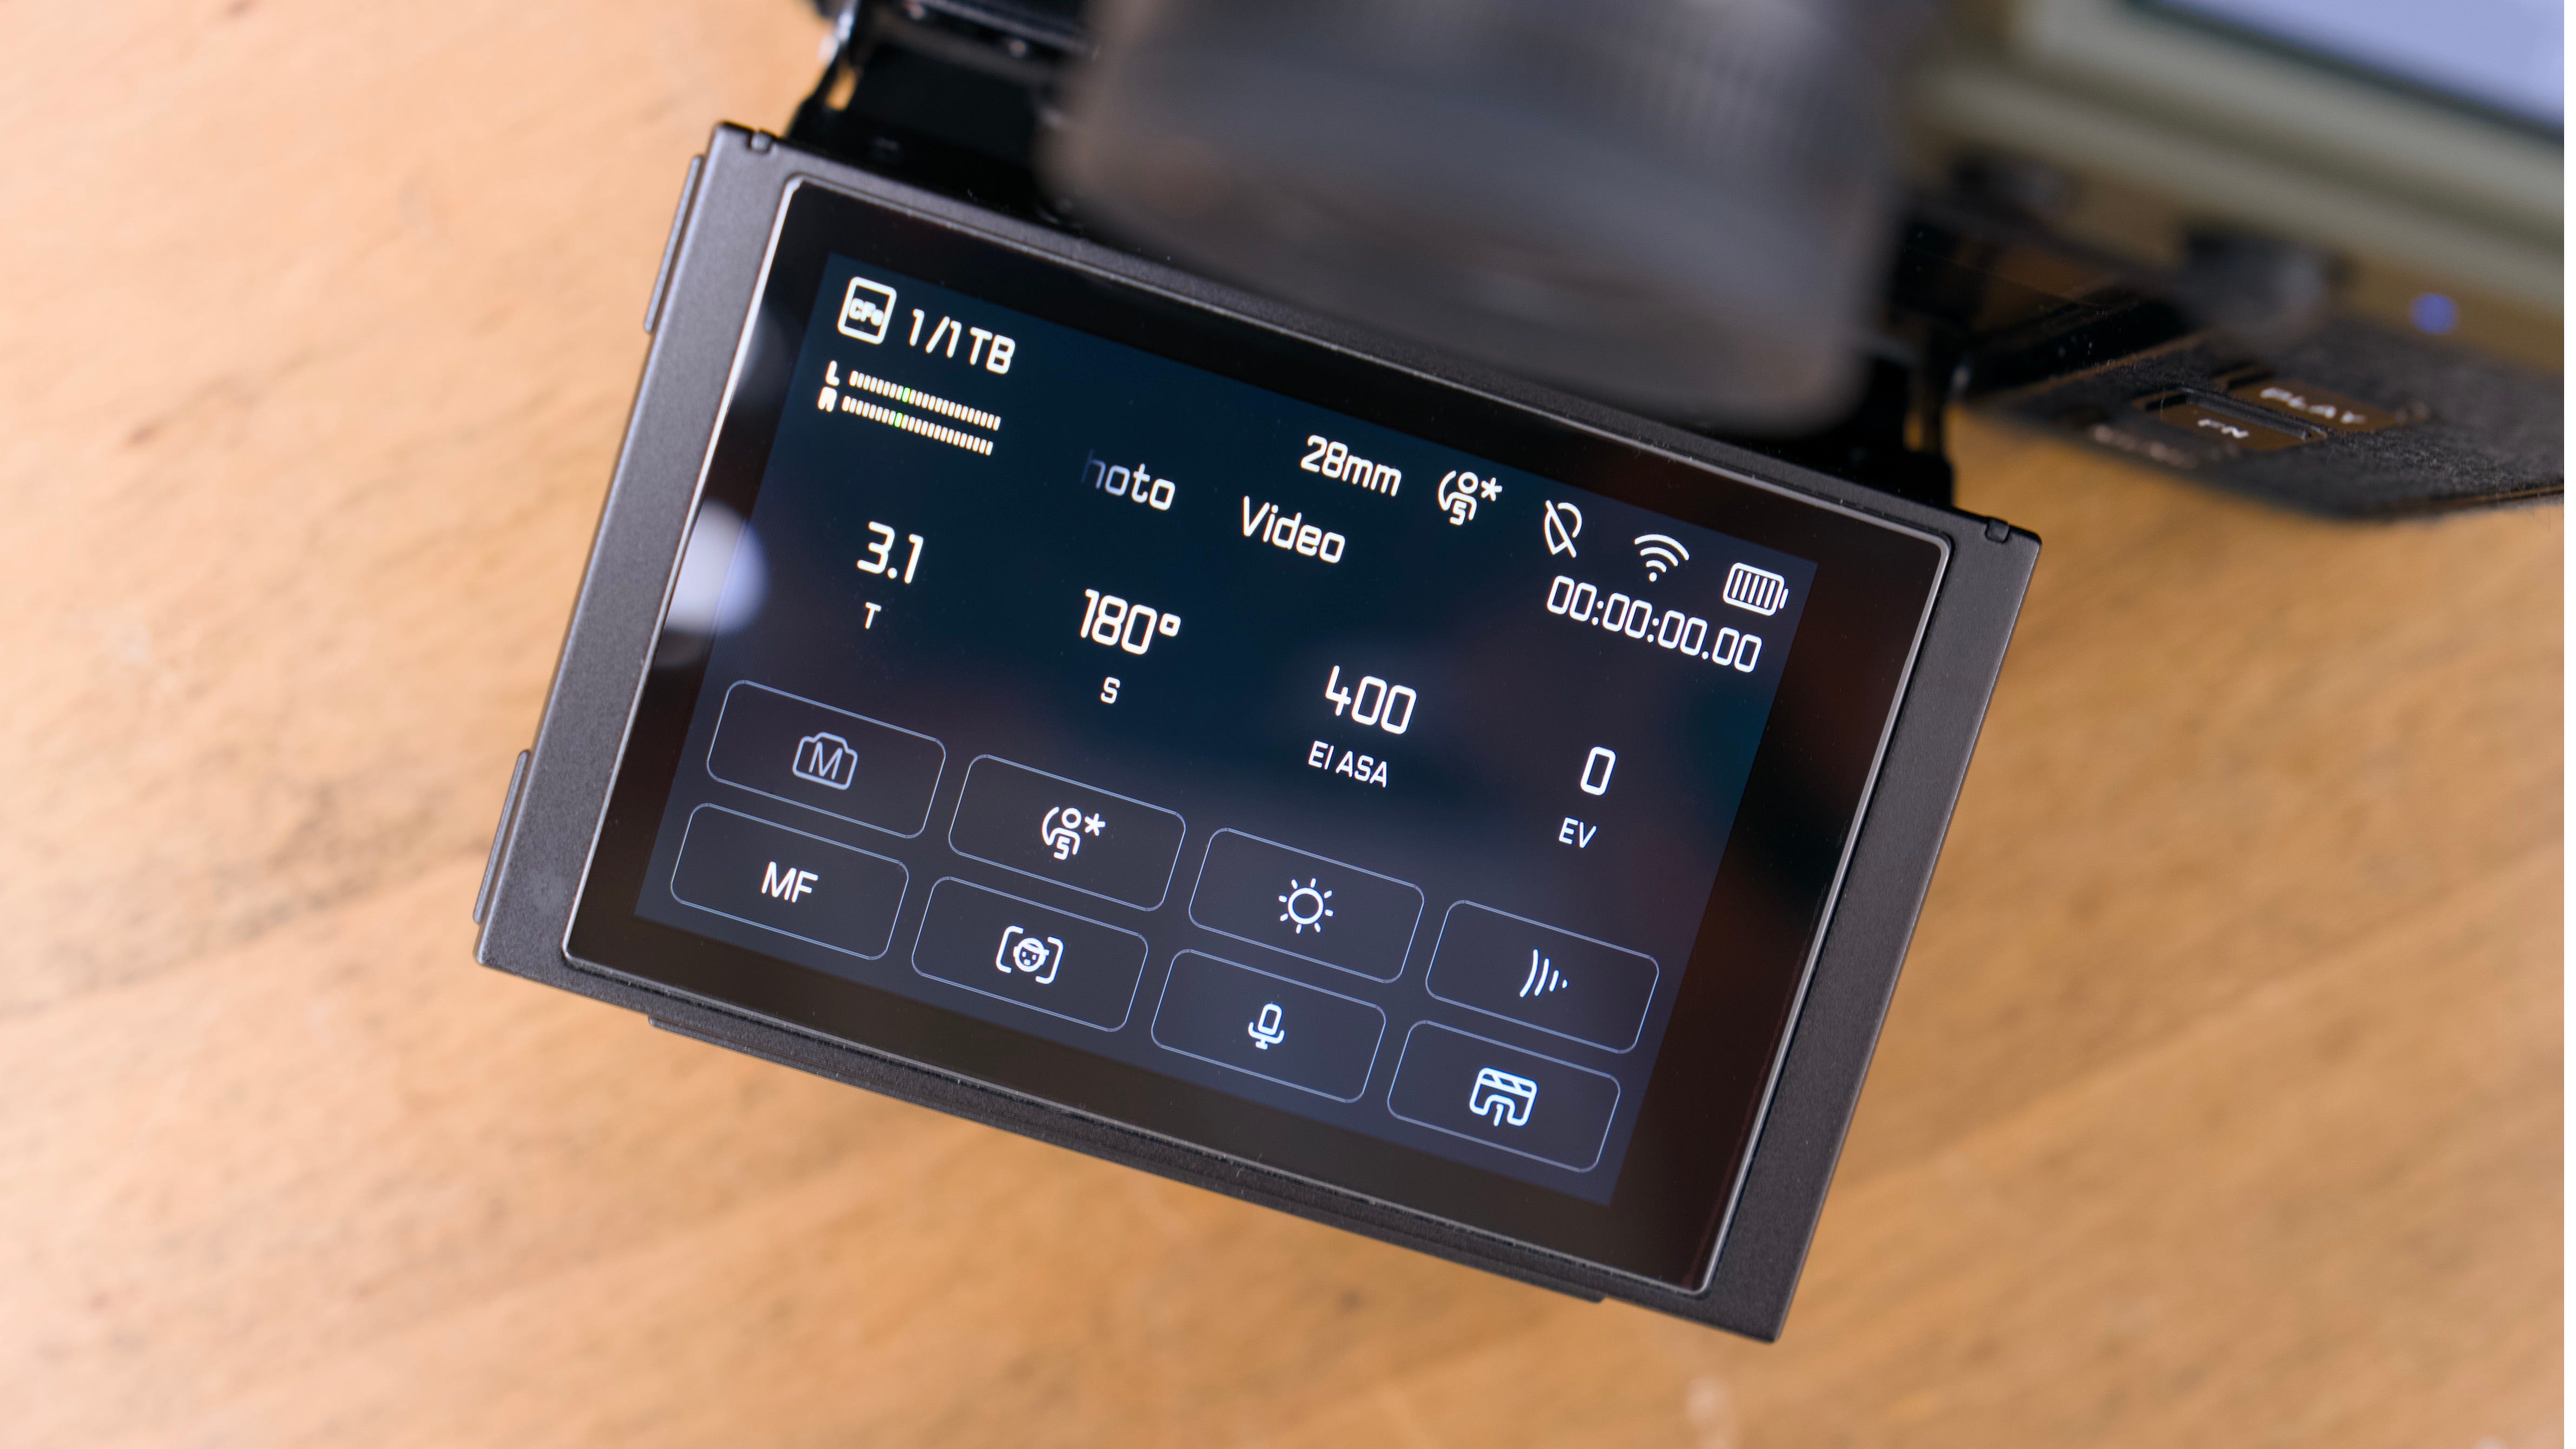
Whether you’re looking through the EVF or the back LCD, you’ll see a lot of data. Or none at all. Out of the box, the clutter can be overwhelming, so I’ve built a configuration that keeps the noise down.

In the Capture Assistants menu, you can customize specific Info Profiles. I keep four of them active and use the back Fn button to cycle through them. This is how each is set up:
Info Profile 1: Everything off for a clean preview of the scene
Info Profile 2: Info Bars top & bottom with the dark background to highglight critical settings
Info Profile 3: All Info Bars with Focus Peaking on (Red & Medium) for more data and accurate manual focus
Info Profile 4: Info Bars top & bottom, 3x3 Grid, Focus Peaking, and Level Gauge on to properly align a scene
These four perspectives give me the exact level of feedback I need for any environment. And with a couple of clicks, I can always strip the data away to ensure nothing stands between me and the shot.
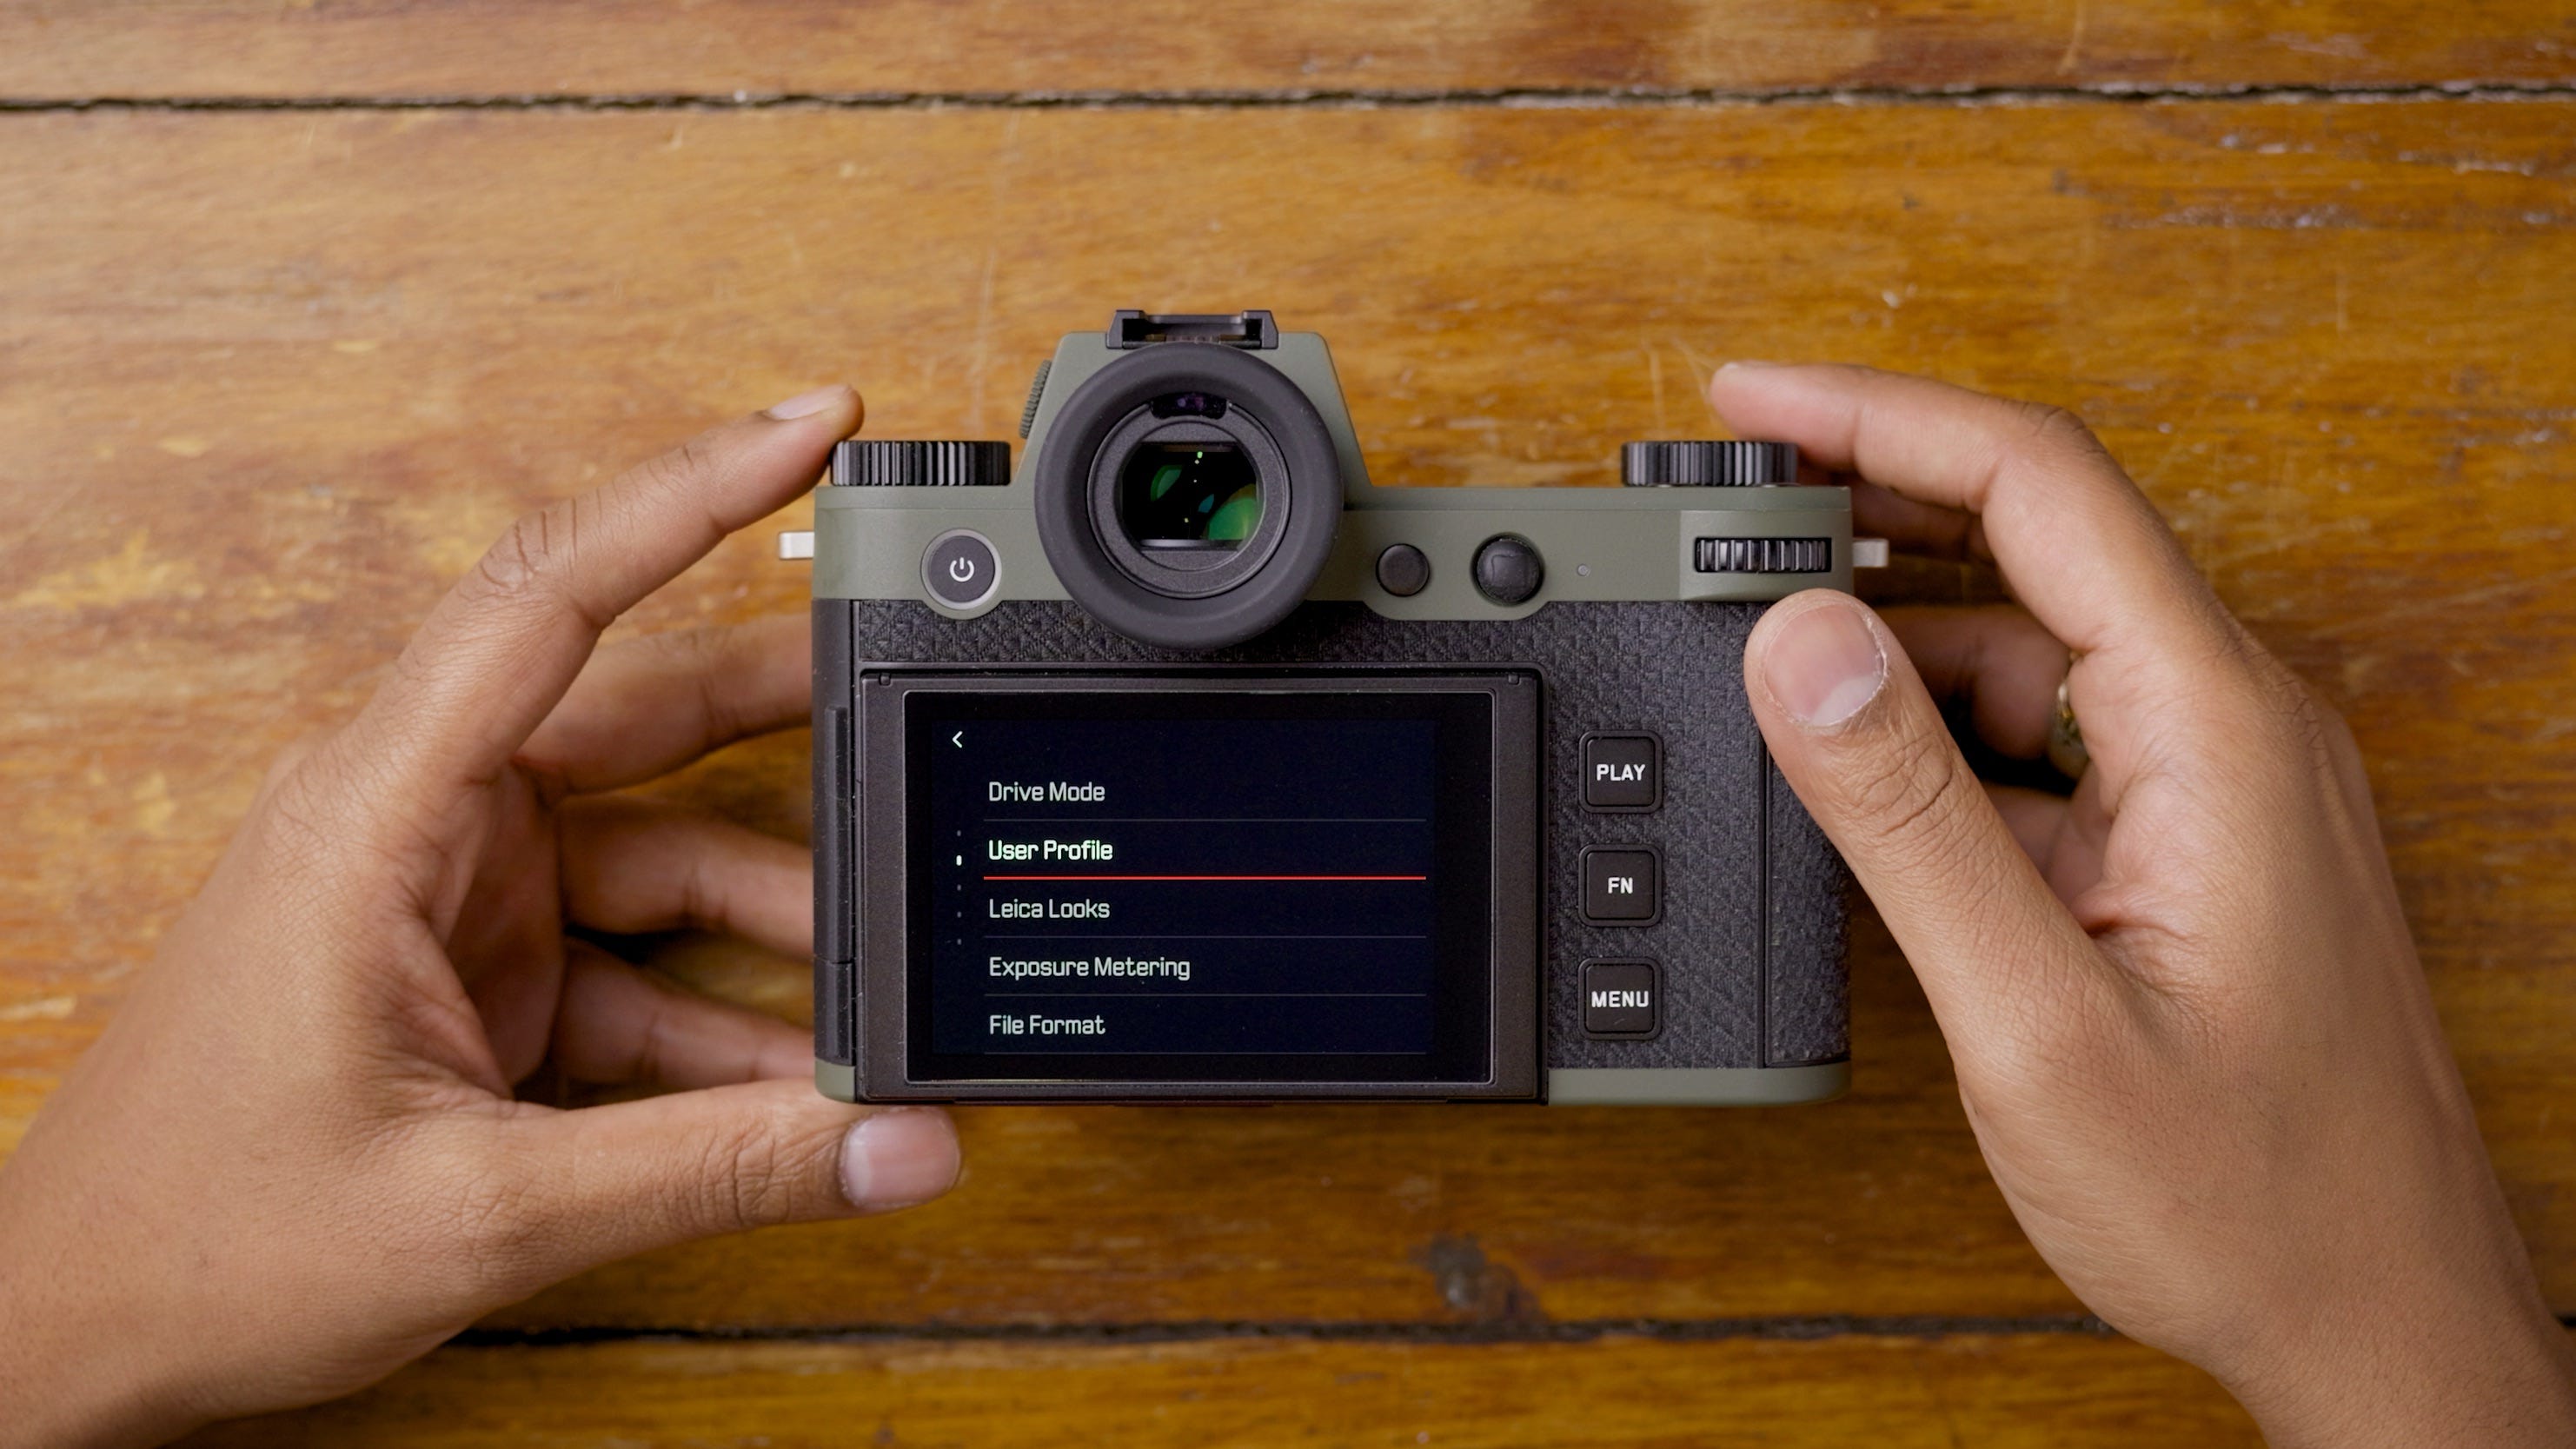
Other Settings
Now that the camera is largely set up, I head to User Profiles and save these settings to Profile 1. It’s a temporary safety net so I don’t lose the progress if I accidentally toggle the factory defaults.
With the bulk of the customization handled, it’s time to dive into the menus for the fine-tuning. These are the choices I make for my specific environments, so take liberties wherever you see fit:
EV Increment: 1/3
File Format: L-DNG/L-JPG
JPG Settings: Noise Reduction Low
Noise Reduction Long Exposure: Off
Flash Settings: On and Flash Sync Start
Storage Management: Change the file name
Shutter Type: Mechanical
Auto Review: Off
Group Display Mode: Off
Live View Settings: P-A-S-M unless I’m shooting with flash
Connectivity: Off by default
USB Settings: USB Charging on and USB Mode is Select
Camera Settings: Customize Display Settings as needed
Once this is all polished, I make sure the Exposure Mode is set to Manual and save it over that first user profile. This is the master template for every specific configuration that follows. It is the solid ground you build the rest of your creative house on.
User Profiles
In my opinion, User Profiles are the most underrated weapon in the Leica arsenal. They allow you to customize the camera at a granular level and save those settings for instant recall. If you’ve followed along, you’ve seen the groundwork we’ve already laid. I use that foundation to build specific profiles I can jump between based on the environments I shoot in most. Here are the three photography profiles I rely on most:
STUDIO 100
This profile works double duty. I’ll use it for when I’m shooting with a flash or when I want revert to manual mode, where I have complete control over key settings.
Mode: Manual
Aperture: Wide-Open, F4.0 or F8.0
Shutter Speed: 1/200
ISO: 100
White Balance: Based on the environment
Exposure Compensation: -1/3
Exposure Metering: Multi-Field
Leica Look: Greg Williams
Autofocus Mode: Continuos
AF Detection: Face/Eye
AF Mode: Field (ie. small box)
AF Profile (under AF Setup): Children/Pets
BRIGHT 400
For bright days where the sun is beaming and the colours are popping, I’ll use this profile to lean into the vibrancy. Now, I’ve been enjoying the Teal Leica Look as my starting point.
Mode: Manual with auto ISO
Aperture: F8.0 mostly
Shutter Speed: 1/500 or faster
ISO: Auto ISO up to 400
White Balance: Daylight mostly
Exposure Compensation: -1/3
Drive Mode: Continuous 4 FPS
Exposure Metering: Multi-Field
Leica Look: Teal
Autofocus Mode: Continuos
AF Detection: Face/Eye
AF Mode: Field (ie. small box)
AF Profile (under AF Setup): Runner
STREET 3200
I’ll use this profile when the lighting of my environment is fluctuating, where shadows can vary from point to point. It gives me a little more latitude to expose a scene, where a ceiling of ISO 3200 is perfectly manageable on modern Leica sensors.
Mode: Manual with auto ISO
Aperture: F4.0 mostly
Shutter Speed: 1/125 or faster
ISO: Auto ISO up to 3200
White Balance: Daylight
Exposure Compensation: -1/3
Exposure Metering: Center-Weighted
Leica Look: Greg Williams
Autofocus Mode: Continuos
AF Detection: Face/Eye
AF Mode: Field (ie. small box)
AF Profile (under AF Setup): Children/Pets
Importantly, these profiles are just starting points. I’ll select one and, if the environment requires an adjustment, I’ll tweak it on the fly. If you aren’t taking advantage of User Profiles, I genuinely need to know why. It’s a small investment of effort upfront that saves an ocean of time throughout the lifespan of your camera. Stop overcomplicating your process. Create User Profiles.
Video Settings
If you plan on shooting video with your SL, I highly recommend reading my Filmmaking Guide. It goes into far more detail regarding settings and best practices. Bookmark that page and read it when you are done here.
Once my three photography profiles are locked, I jump into video (swipe left in the Control Center to switch modes). I customize all the same pages and buttons to largely mirror my photo workflow. Here is my setup:
Custom Button Setup
Top Left Fn: AF Frame Size
Top Right Fn: AF Mode
Front Top Fn: Dial Lock
Front Bottom Fn: Toggle AF
Centre Fn: False Colour
With firmware 4.2, I’ve changed this shortcut to activate False Colour and get an easy preview of the exposure of my scene.
Thumb Wheel: Magnification
Fn: Info Profiles
Control Center in Video Mode
Exposure Mode
User Profile
White Balance
Connectivity
Focus Mode
AF Setup
Microphone Gain
Video Profiles
With the other settings, I mimic my photo setup wherever possible. For Info Profiles, I create a fifth option with top and bottom bars and a custom frameline of 11.00 x 23.00 at 98 percent scale. I turn on shading and a frame stroke of 1. This allows me to preview a rough 9:16 crop while recording 6K footage for social platforms.
Before I share my two specific video profiles, here are the core features I adjust:
Cine Mode: On
L-Log Settings: L-Log -2 Sharpness
Wind Reduction: Off
Segmented Video: Off
Recording Frame: On
Image Stabilization: On when needed
User Profiles
With the core setup locked, I dial in the settings for two video-centric profiles: one for standard work and one for slow motion.
C6K
This is my go-to profile. It offers the best combination of colour and dynamic range without requiring an external recorder.
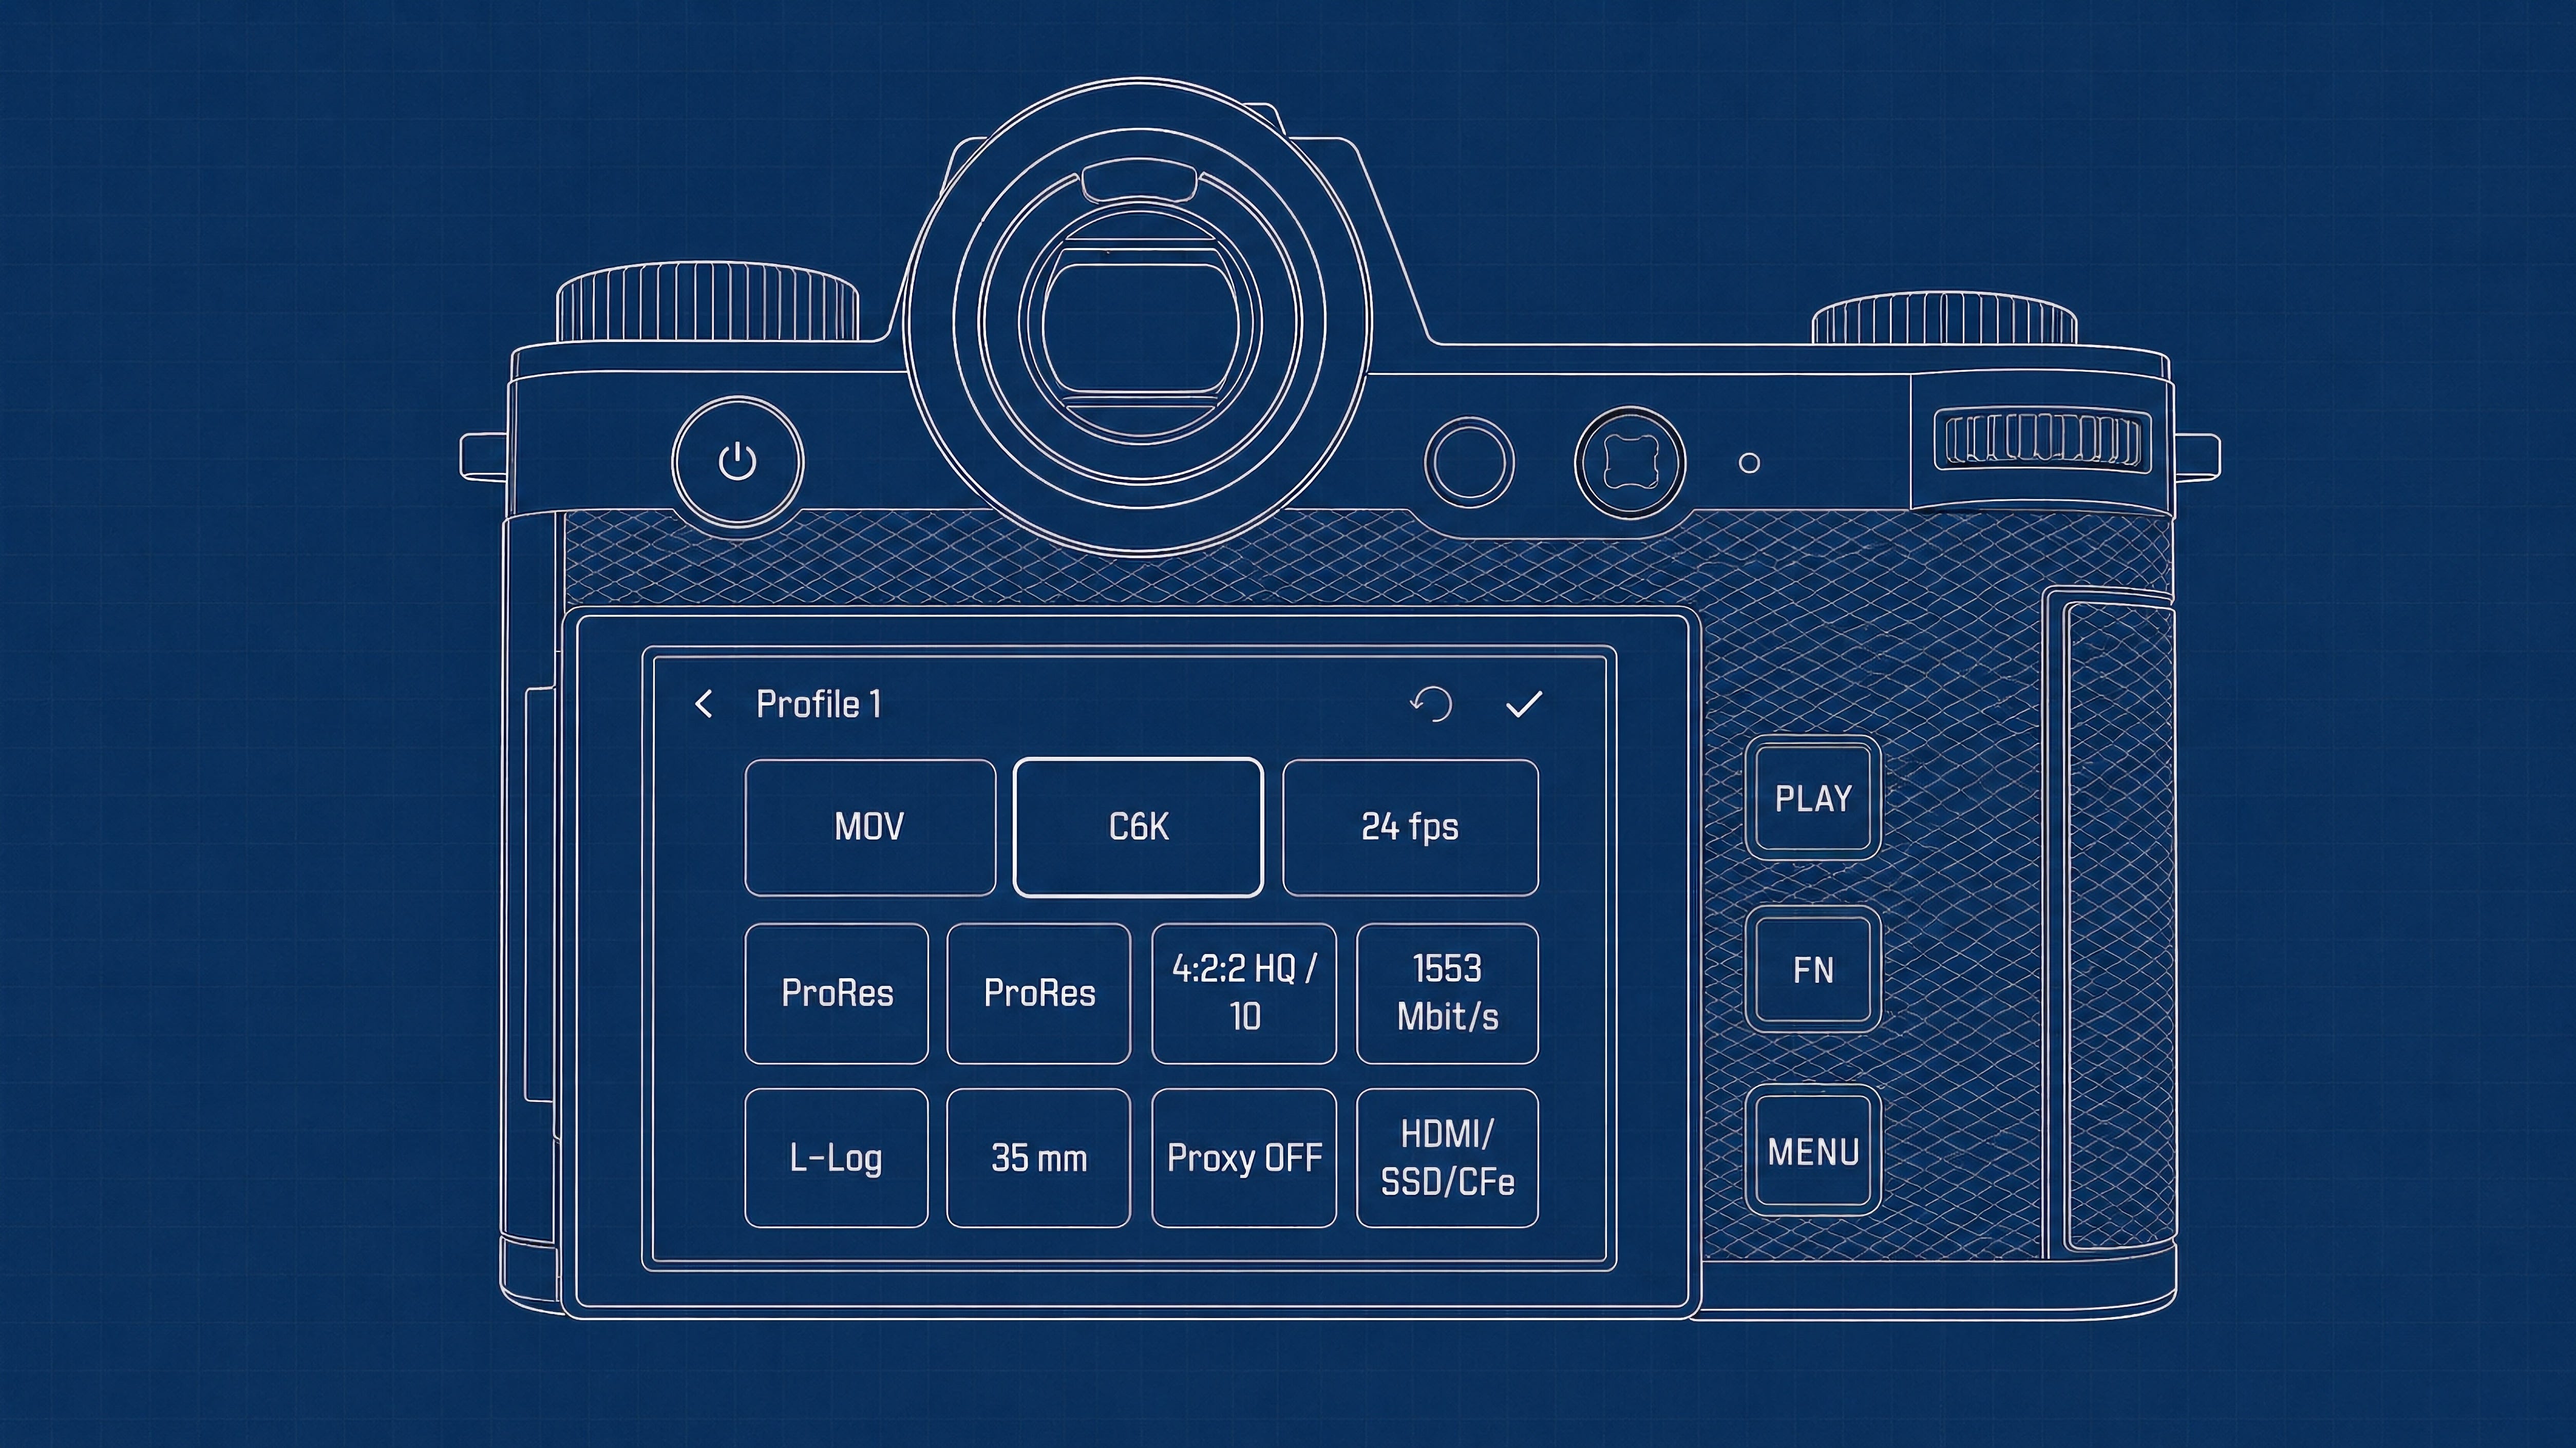
Format: MOV
Resolution: C6K
Frame Rate: 24 FPS
Codec: ProRes
Compression: ProRes
Color Sampling: 4:2:2 HQ 10-bit
Bitrate: 1553 Mbit/s
Log Profile: L-Log
Sensor Ratio: 35mm
Proxy: OFF
Recording Options: HDMI / SSD / CFexpress
SLO MO 60FPS
The SL3-S supports up to 120 FPS in Full HD, but I prefer filming at 60 FPS with higher resolution and slowing it down in post-production. If a project requires something slower, I adjust accordingly.
Format: MOV
Resolution: C4K
Frame Rate: 59.94 FPS
Codec: ProRes
Compression: ProRes
Color Sampling: 4:2:2 HQ 10-bit
Bitrate: 1944 Mbit/s
Log Profile: L-Log
Sensor Ratio: APS-C
Proxy: Off
Recording Options: HDMI / SSD / CFexpress
Wrapping Up
This guide is the culmination of five years of mistakes, triumphs, and the hard-earned rhythm of a system that finally works. It’s built to be a shortcut for your own journey, a way to strip away the technical noise so you can get back to the art. If this guide helped you find your footing, please consider sharing it with others.
Upcoming Events & Workshops
Leica Akademie: Video for Photographers - London
This June, I’m leading a two-day workshop in London for photographers who want to learn video. Whether you’re looking to create short films, branded content, or simply elevate your visual storytelling, this workshop provides a practical introduction to filmmaking. Sign up here.
Seats for my 2026 India workshop are currently sold out. If you’re still interested, you can join the waitlist here to be notified if a spot opens up or when new dates become available.
Previous Guides
January Contest
This month, I’ll be giving away a $250 gift card to the Moment Shop where the winner can save big on their next camera, lens, bag, or courses. Moment has so many creative products to choose from and $250 can absolutely make for a great deal.
How will I pick the winner? Make sure you’re signed up for this newsletter then leave a comment on at least one post from this month. I’ll be randomly picking one person, confirming they meet the requirements and contacting them directly before announcing the winner publicly.
As always, this contest is void where prohibited by law. Good luck!
My thanks to the team at Moment! Not only for this contest but for being the longest supporter of my work online. They’re a lean team of passionate creators that truly believe in supporting other creatives on their journey. Whether it’s a new camera, lens, workshop, or just some great articles, visit ShopMoment.com today.
What’s Next?
Last fall, I mapped out the first six months of Church & Street stories and if you’ve been paying attention, you can tell it’s going to be a vibrant year for the newsletter. For subscribers, I’ll be widening the breadth of topics and share a series of intimate stories that really bring you closer to my journey.
It’s going to be a great year.
GB
Thank you for this straightforward, no nonsense guide. Totally made me rethink user profiles. Previously I only kept one profile (my settings) so if anyone else used the camera, I could quickly get back to my default. But I will be trying different video profiles for different frame rates now, great idea.
Great job, Gajan. Question: does this FW update fix the magnification issues when using M lenses. I added back an SL2 as that EVF really does a better job. It's the same EVF so it remains one of life's great mysteries.