

Mastering Tethered Photography
My go-to gear for seamless portrait shoots

Tethered photography is one of those practices that feels like a luxury until you use it a few times and realize it’s a necessity. Whether you’re in the studio or working on location, a solid tethered setup can speed up your workflow, reduce reshoots, and help you and your team make smarter creative decisions on the fly.
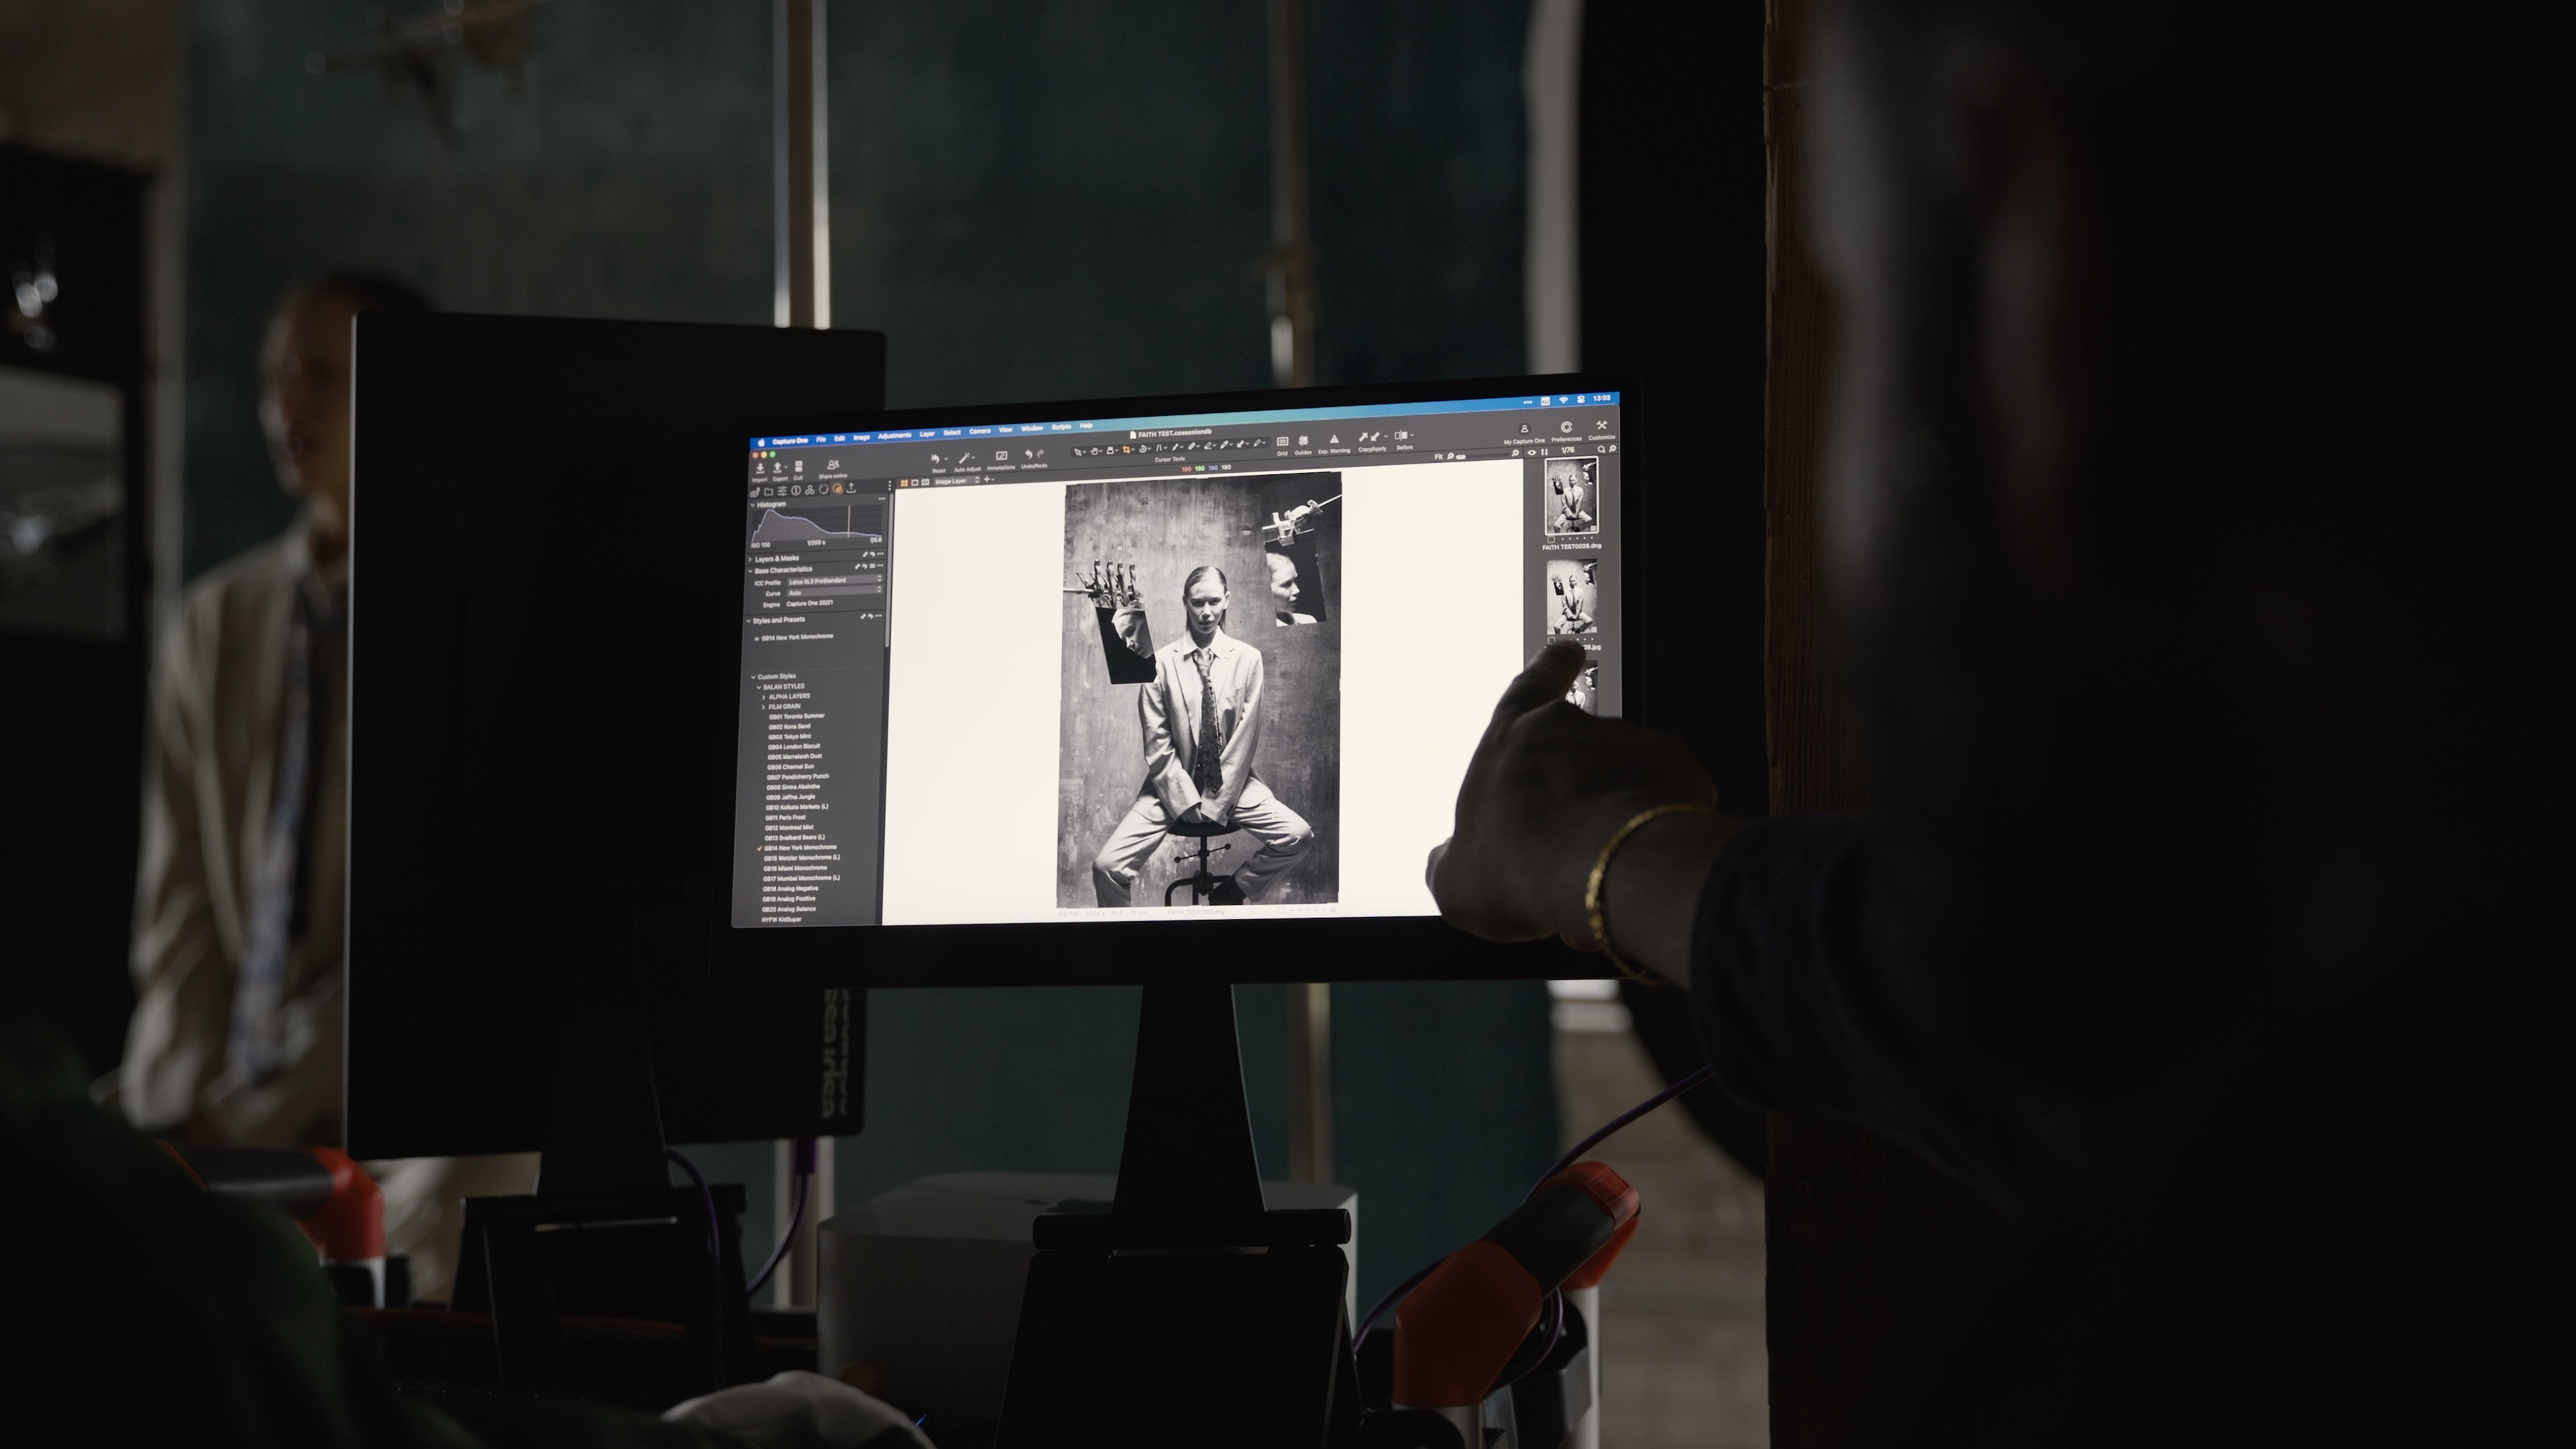
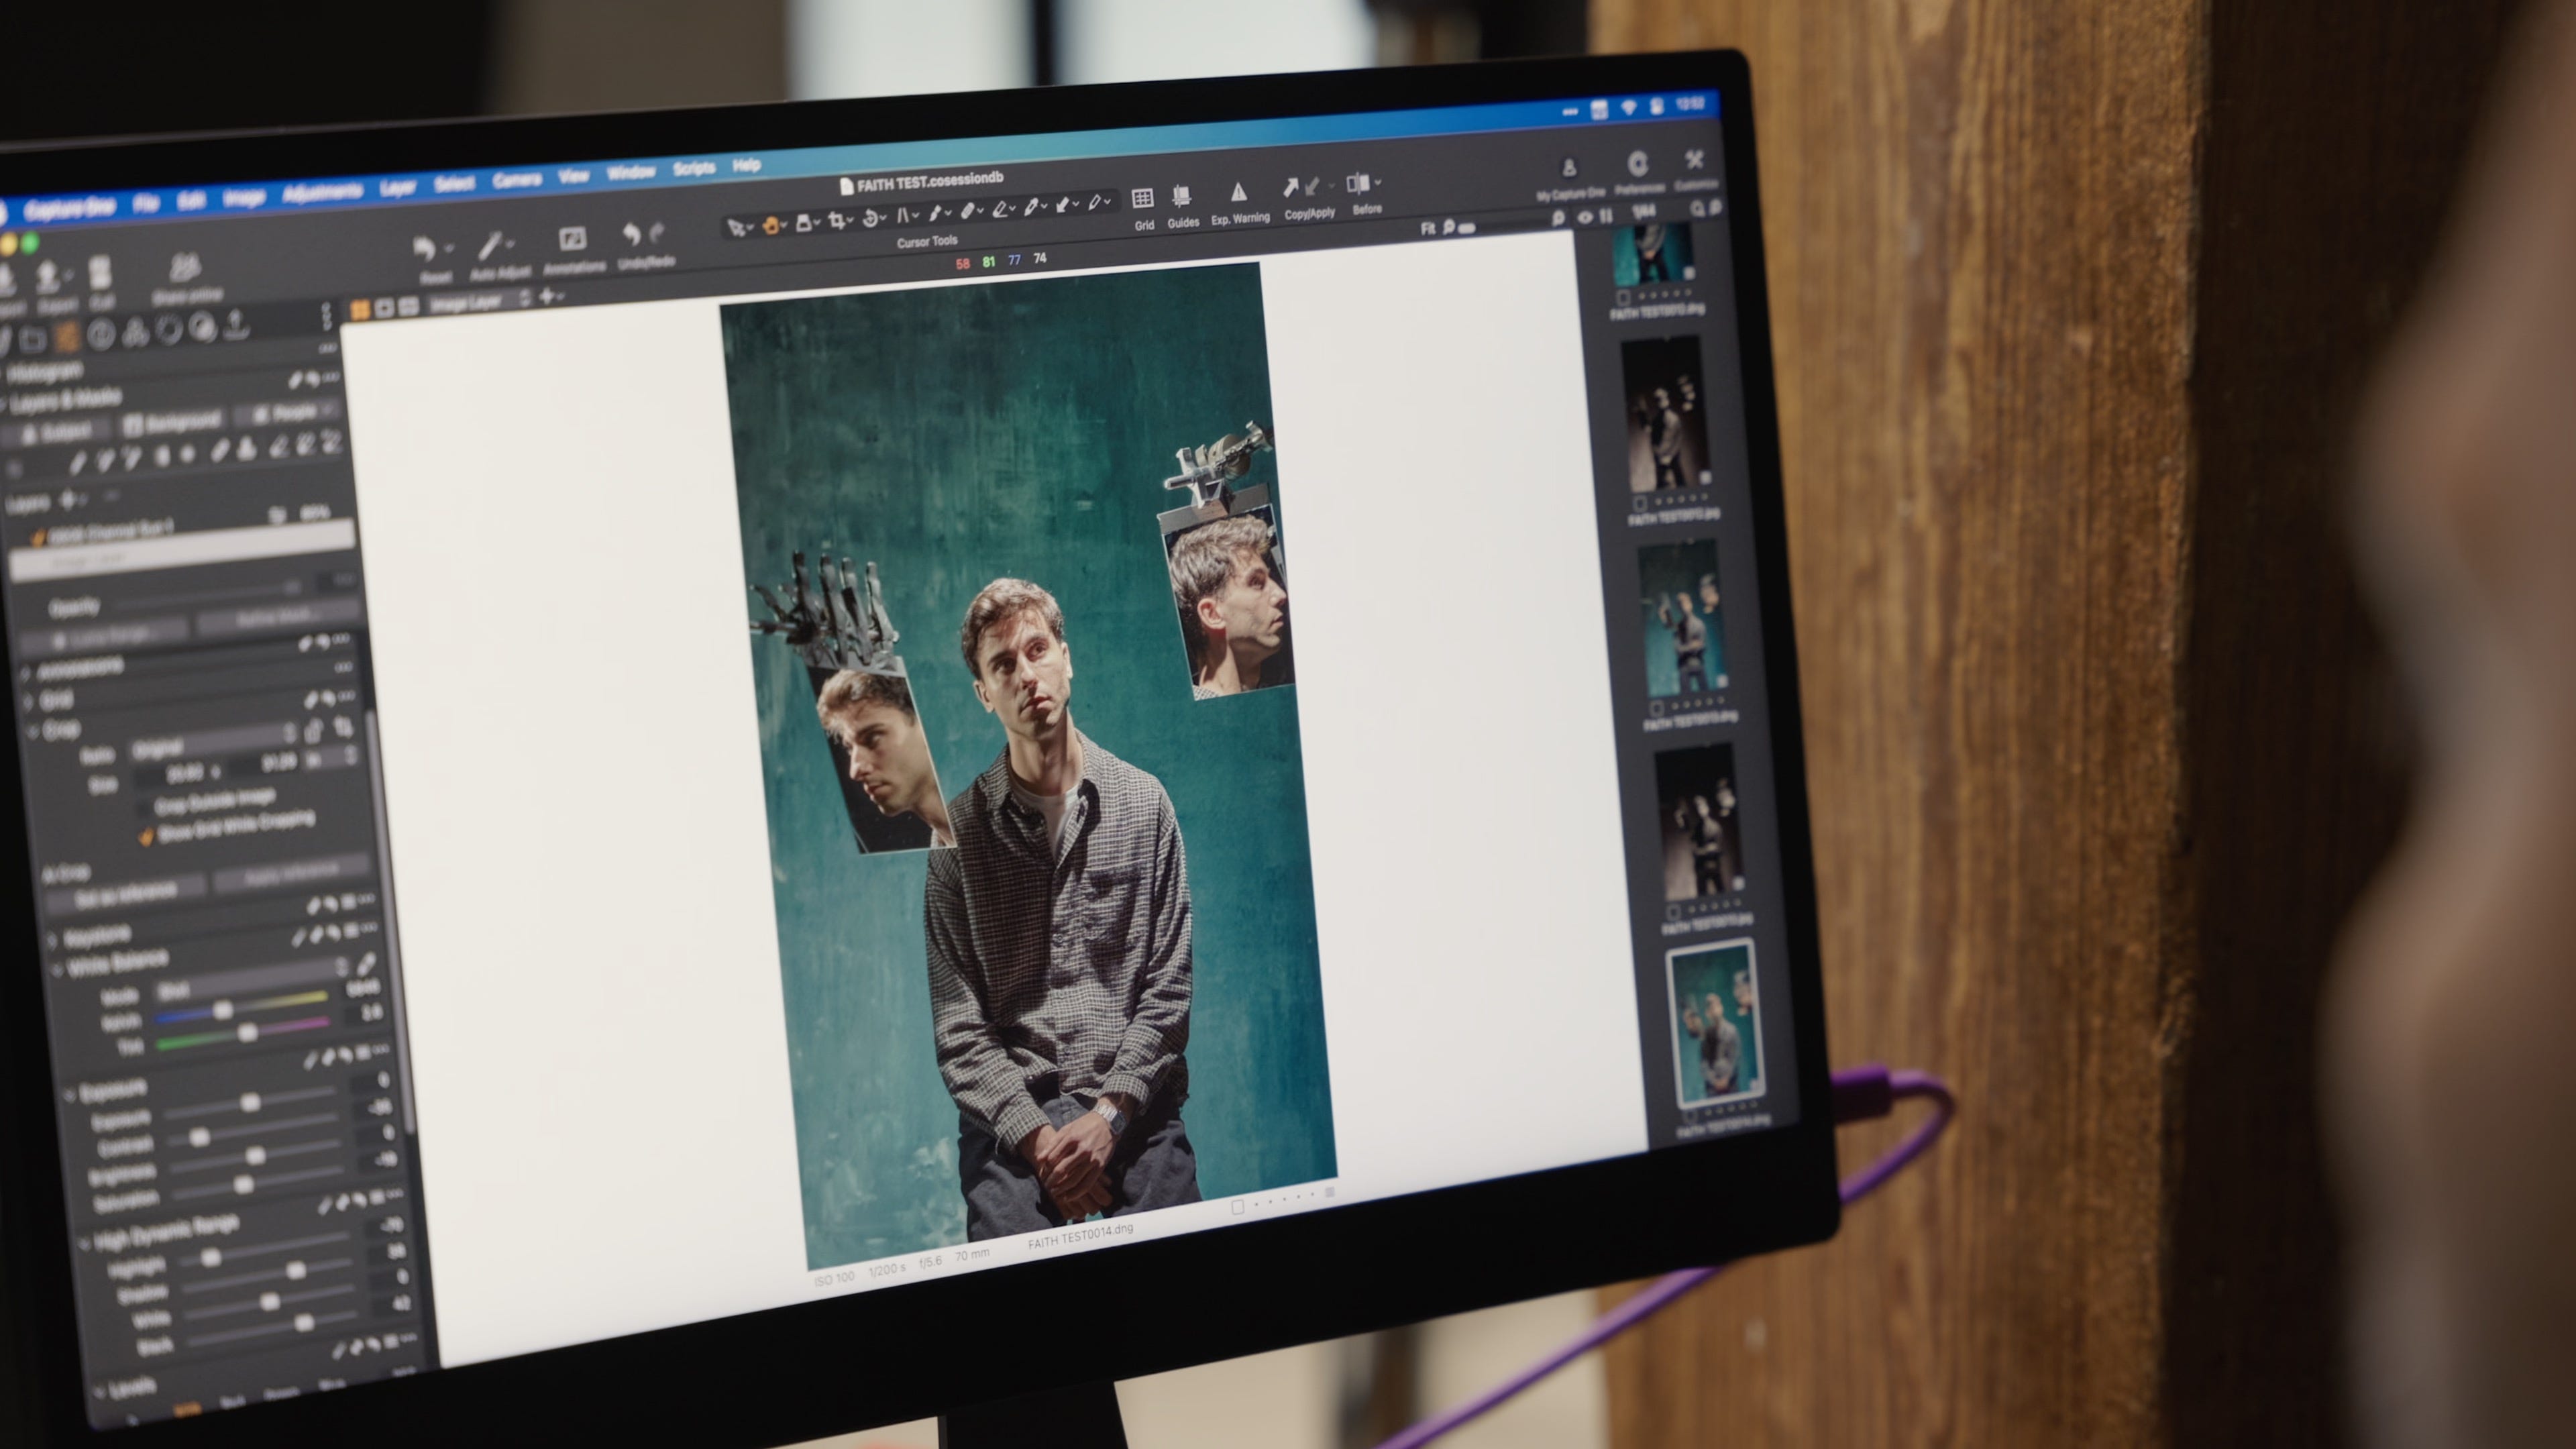
Tethered photography is the process of connecting your camera directly to a computer or tablet so that each photo you take appears instantly on a larger screen. This connection (usually made via a USB cable) lets you review images in real-time, adjust settings on the fly, and collaborate more effectively with clients or team members. It turns your camera into part of a live workflow, making the creative process faster, more accurate, and more collaborative.
I’ve previously shared how to get started with tethered photography from a software perspective. This week, I’m breaking down the key gear I rely on to make that experience seamless, reliable, and portable.
The Setup For Success
A good setup doesn’t just happen. It’s built piece by piece, with the right tools in the right places. Here’s what I rely on.
1. Reliable Power: The Unsung Hero
Start with the basics. You need power. More importantly, you need reliable power.
I never walk onto a set without an extension cord and surge protector. It might sound like overkill if you shoot in well-equipped spaces, but power failures can ruin a production in an instant. Surge protection gives me peace of mind that my laptop, camera, monitors, and other gear are safe. Especially when you’re drawing a lot of power from a single source.
If you’re building your own tether station, treat power as a foundational element, not an afterthought.
2. A Capable Computer
You’ll need a machine that can run your tethering software smoothly.
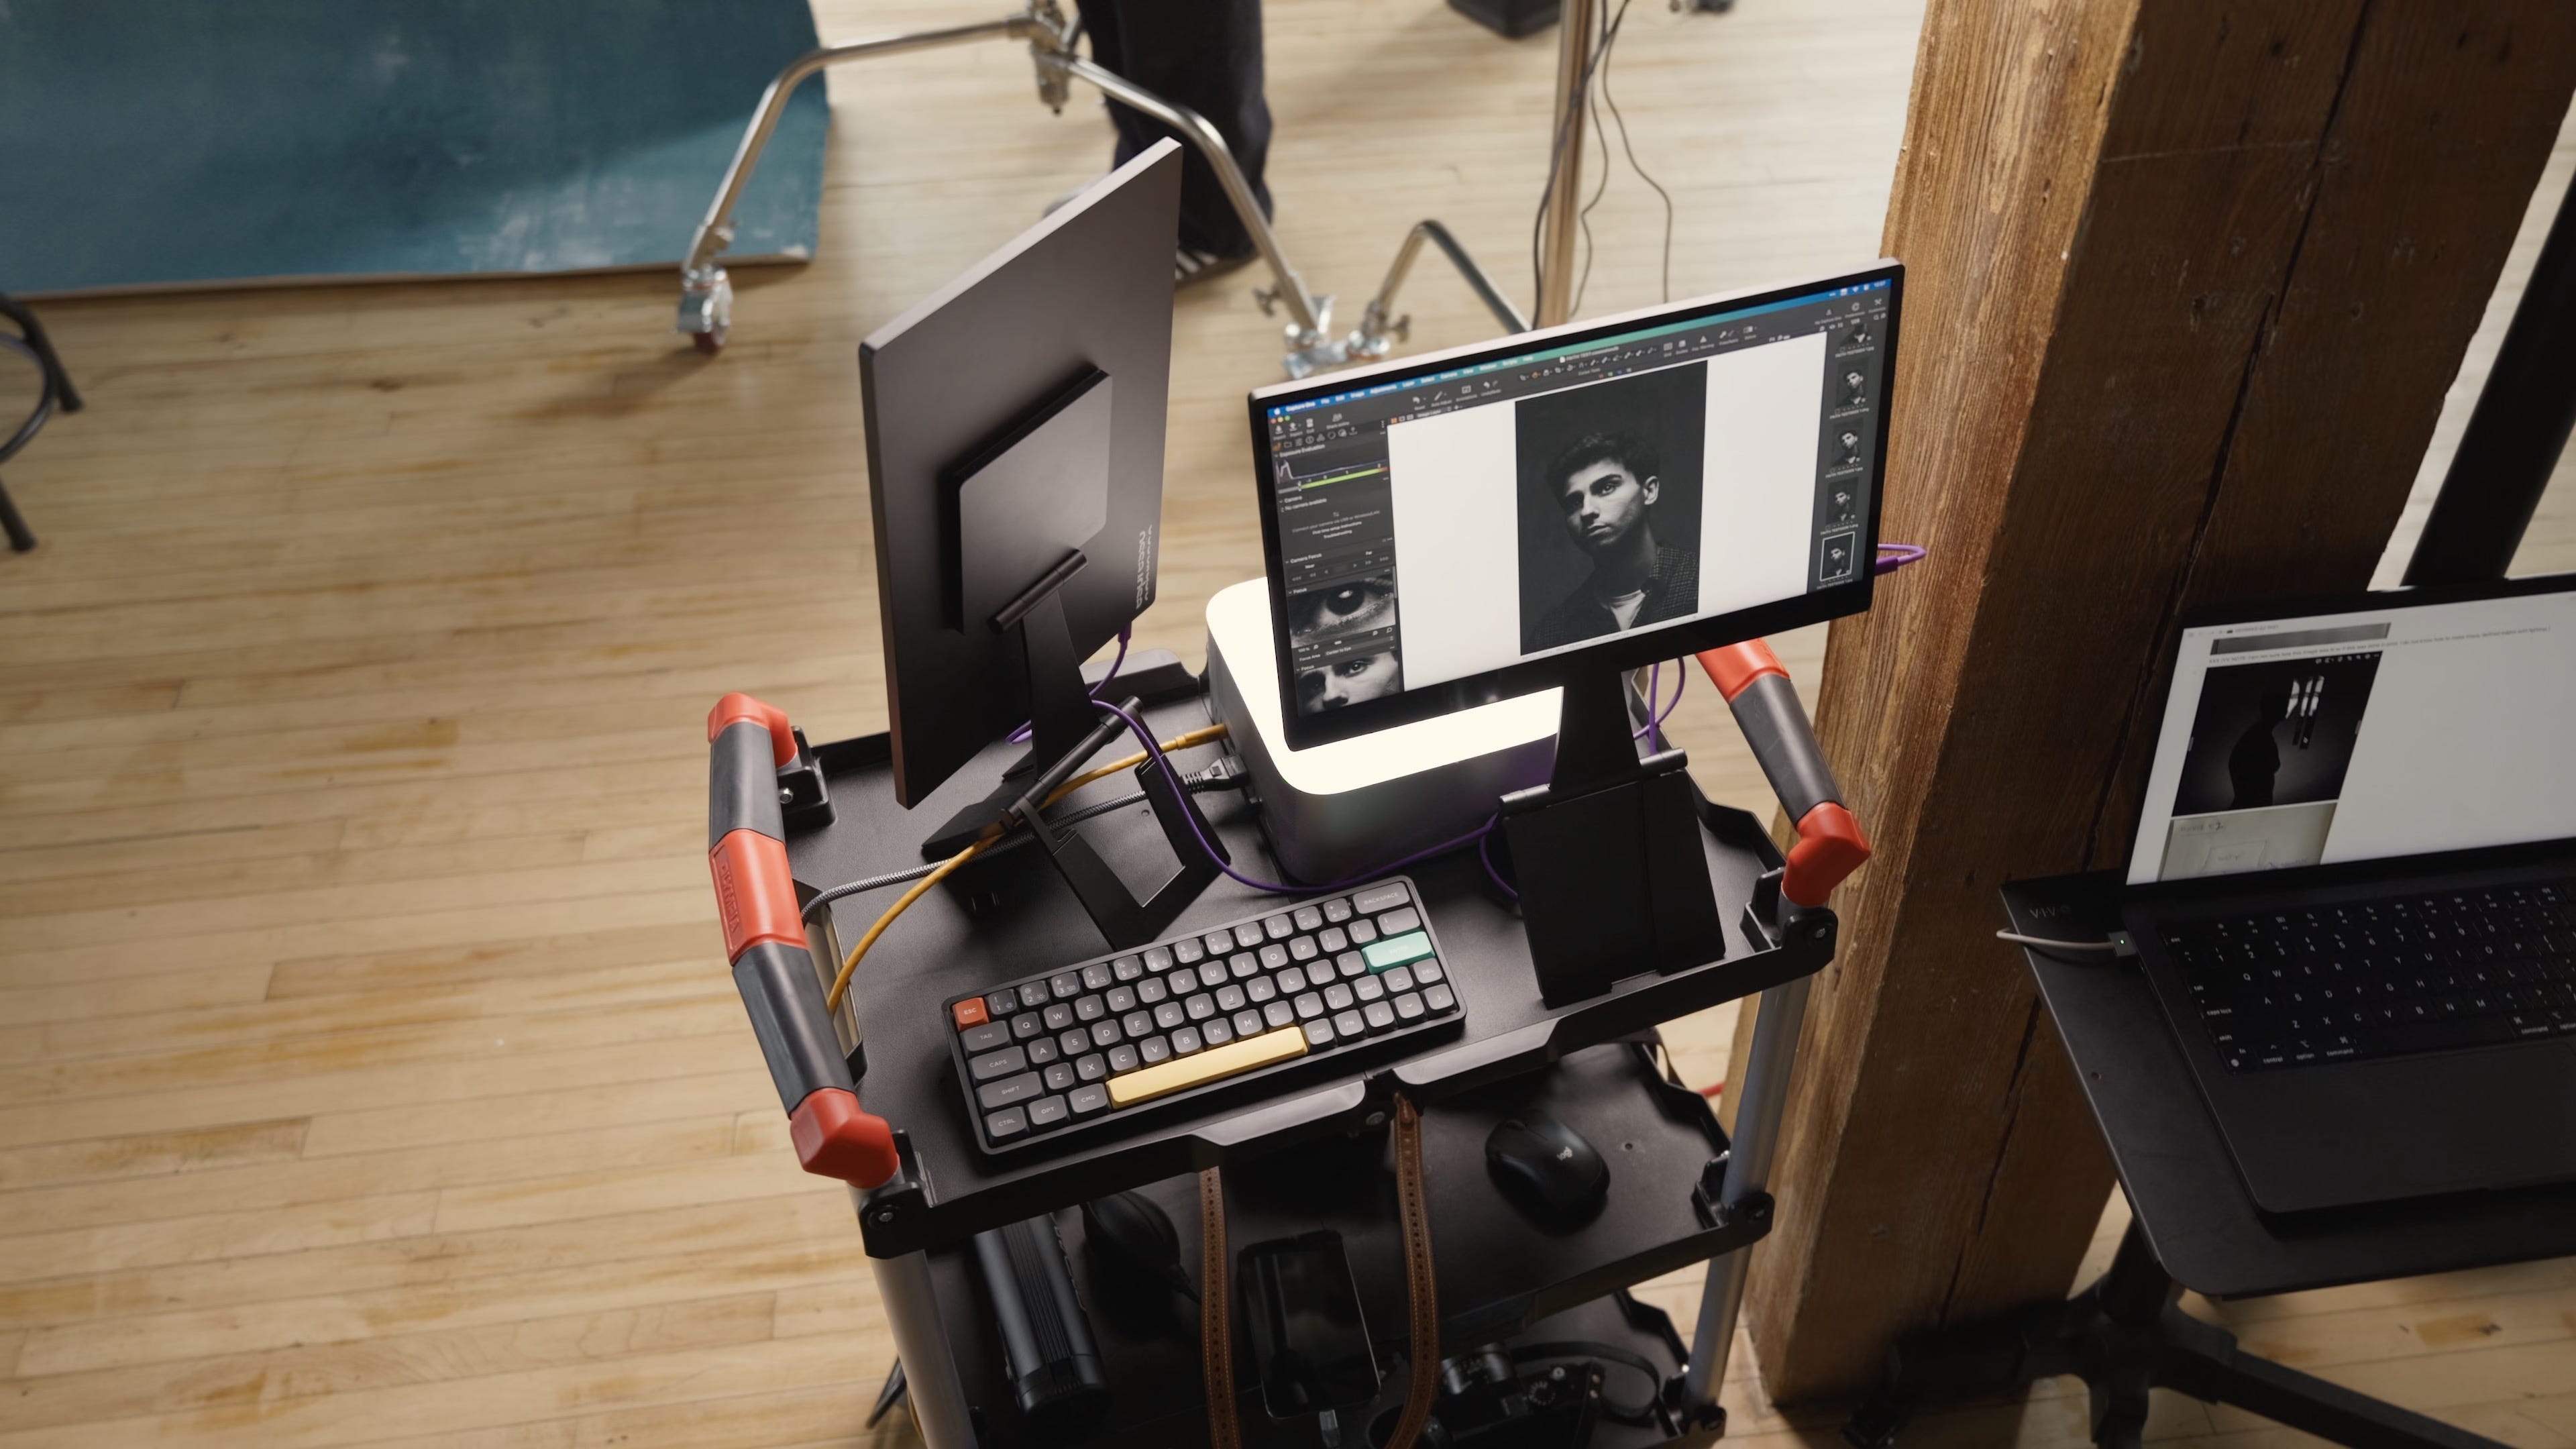
For smaller shoots, I often bring my MacBook Pro. But for larger commercial sets, I bring my Mac Studio. With six Thunderbolt 5 ports and an insane amount of GPU power, it’s built for high-performance tasks like real-time review and image processing.
That said, you don’t need a powerhouse machine to get started. A Mac Mini or any modern laptop with decent specs will do just fine as long as it’s compatible with your camera and software.
The goal here isn’t to chase specs. It’s to ensure your setup doesn’t slow you down.
3. Software That Just Works
Next up is the tethering software. For me, the choice has been obvious for years: Capture One Pro.
It’s fast, stable, and has some of the best tethering capabilities out there. New camera support is usually available right at launch, which is huge if you’re shooting with recently released gear. Their latest updates even improve how session folders are handled, making it easier to stay organized while shooting.
In short, Capture One helps me focus on the shoot instead of fiddling with settings.
4. A Purpose-Built USB Cable
To bring it all together, you’ll need a tethering cable, usually USB-C these days.
After testing a few options, I now exclusively use TetherTools cables. They’re engineered for professional photography, and you can tell. The build quality is excellent, and more importantly, they make tether blocks which are these small accessories that secure the cable to your camera and reduce strain on the ports.
Yes, they cost a bit more than generic cables. But when you’re on set and the stakes are high, the last thing you want is a loose or finicky connection. Invest once, and you’ll thank yourself later.
5. An External Display That Elevates the Whole Experience
This last piece might seem optional but it’s a been a game changer for me. So much so, I reached out to the team for brand partnership.
I use an Espresso Display, now the new 15 Pro model, which has become my go-to for both studio and travel work. It’s slim, ultra-portable, and connects via USB-C, which makes the whole setup much cleaner. The 4K resolution, 100% Adobe RGB coverage, and touchscreen support are incredible perks for anyone working with visuals.
I’ll often set up one or two displays on set for myself, collaborators, clients, or assistants. Being able to review work in real-time, in full color, on a bright and accurate display can help the whole team make sharper decisions.
This Week’s Sponsor: Espresso Displays
I’ve been using Espresso displays for over a year, and they’ve become a staple in my workflow—whether as an extra monitor at home or my main screen on overseas shoots. The Pro series is built for creatives who care about colour, clarity, and portability.
You already know the perks of their new 15 Pro. What sets them apart even more is their customer support. Based in Australia, the team at Espresso is focused on building quality products and backing them with top-tier service. As you can see from their Trustpilot score and immediate response to concerns.
I only partner with brands I genuinely use and believe in. After a year of putting these displays to work, I can confidently recommend them to any creative looking for a high-quality travel monitor.
Use code GAJAN10 at checkout to save 10% on your first order. And if you do try one out, let me know how it goes. I’d love to hear about your experience.
Recap: Tethered Photography Essentials
If you want to build a tether setup that’s dependable, portable, and professional, here are the core pieces:
Extension cord and surge protector – to safeguard and distribute power efficiently
Computer or laptop – any modern machine that can run your tethering software
Tethering software – I recommend Capture One Pro for stability and pro features
High-quality USB cable – like those from TetherTools, along with a tether block
External display – for high-res, colour-accurate, comfortable monitoring
Build your tethering kit with intention and you’ll set yourself up for smoother shoots, smarter decisions, and stronger work. Each and every time.
Previous Favourites
What’s New?
This weekend, I was in Kansas for the Unbound Gravel bike race with my good friend Kevin. It was my first time at a cycling event, which made it the perfect chance to explore a new world and put some fresh gear to the test.
Next month’s travel calendar is filling up fast. Expect some stories from London, Paris, and Wetzlar in the near future.
GB