

WTF Are Light Ratios And Why Should You Care?
Deepening our understanding of lighting and the study of photography

Every month, I bring my team to the studio for a day of testing and learning. We start each session with a recap of what everyone’s been working on over the past month before jumping into five straight hours of intentional practice.
In our last session, I decided to bring the team up to speed on light ratios. Everyone’s understanding was at a different level, and my goal was to bring everyone to a standard that would not only benefit my projects but also support their own journeys. The result of that session made me realize I needed to put this lesson into writing.
This week, we’re diving into the weeds with lighting and injecting some science into the arts. Enjoy.
Why Are These Ratios Valuable?
Before I explain what light ratios are and how to measure them, let me start with why they matter:
Deepens your understanding of light where you can better contextualize what you're seeing.
Speeds up your workflow on set by taking guesswork out of adjusting your settings.
Improves your ability to study photography by reading light more accurately.
Maintains consistency across your work through foundational knowledge of light.
Strengthens your communication on set by formalizing key metrics.
It might sound like snake oil to some of you, but that couldn’t be further from the truth. When you know how to read light and communicate it intelligently, you become a much more effective photographer. That’s the ‘why’ behind this week’s story. Now let’s jump into the ‘what’ and ‘how.’
What Are Light Ratios?
As most of you know, a ratio compares two quantities or measurements. Light ratios are simply a comparison of light levels between two points, typically a key light (main source) and a fill light (secondary source).
While you can apply this concept to more than two sources, for the sake of simplicity and building foundational knowledge, we’ll stick to just two for now.
Let’s say you’re looking at a portrait where both sides of the face are evenly lit. This means there’s no contrast between the left and right sides, and the light ratio would be 1:1.
Now, if you adjust the lighting so that the right side of the face is half as bright as the left (one stop of light darker), the left is now twice as bright as the right. This gives you a 2:1 light ratio. The key light, as the brightest source, is always represented by the larger number. The ‘1’ in the 2:1 ratio refers to the fill light or the darker measurement.
Understanding The Math
Here’s a quick breakdown of some common light ratios and what they represent:
1:1 ratio = 0 stops difference; no contrast
2:1 ratio = 1 stop difference; light contrast
4:1 ratio = 2 stops difference; medium contrast
8:1 ratio = 3 stops difference; high contrast
16:1 ratio = 4 stops difference; deep contrast
Another way to think about it:
0 stop difference = equal brightness (1:1)
1 stop difference = key is 2x brighter (2:1)
2 stops = key is 4x brighter (4:1)
3 stops = key is 8x brighter (8:1)
4 stops = key is 16x brighter (16:1)
Now that we’ve covered what light ratios are, why they matter, and how the math works, let’s look at how to measure them in a photography environment.
How Do You Measure Ratios?
To measure light ratios accurately, you need a light meter. This is the one I’ve used for the past seven years. This 4-minute video is a solid primer on how it works.
Once you have a meter in hand, set your camera’s shutter speed and ISO on the meter. Then, hold the meter in front of your subject, facing the direction of the light source, and trigger your flash. The reading will display an F-stop, which tells you the aperture needed for proper exposure at that spot.
Next, move the meter to a second point on your subject (typically the fill or shadow side) and take another reading. If this side is darker, the meter will show a wider F-stop, indicating you’d need a wider aperture to properly expose it. The difference between these two readings is your light ratio.
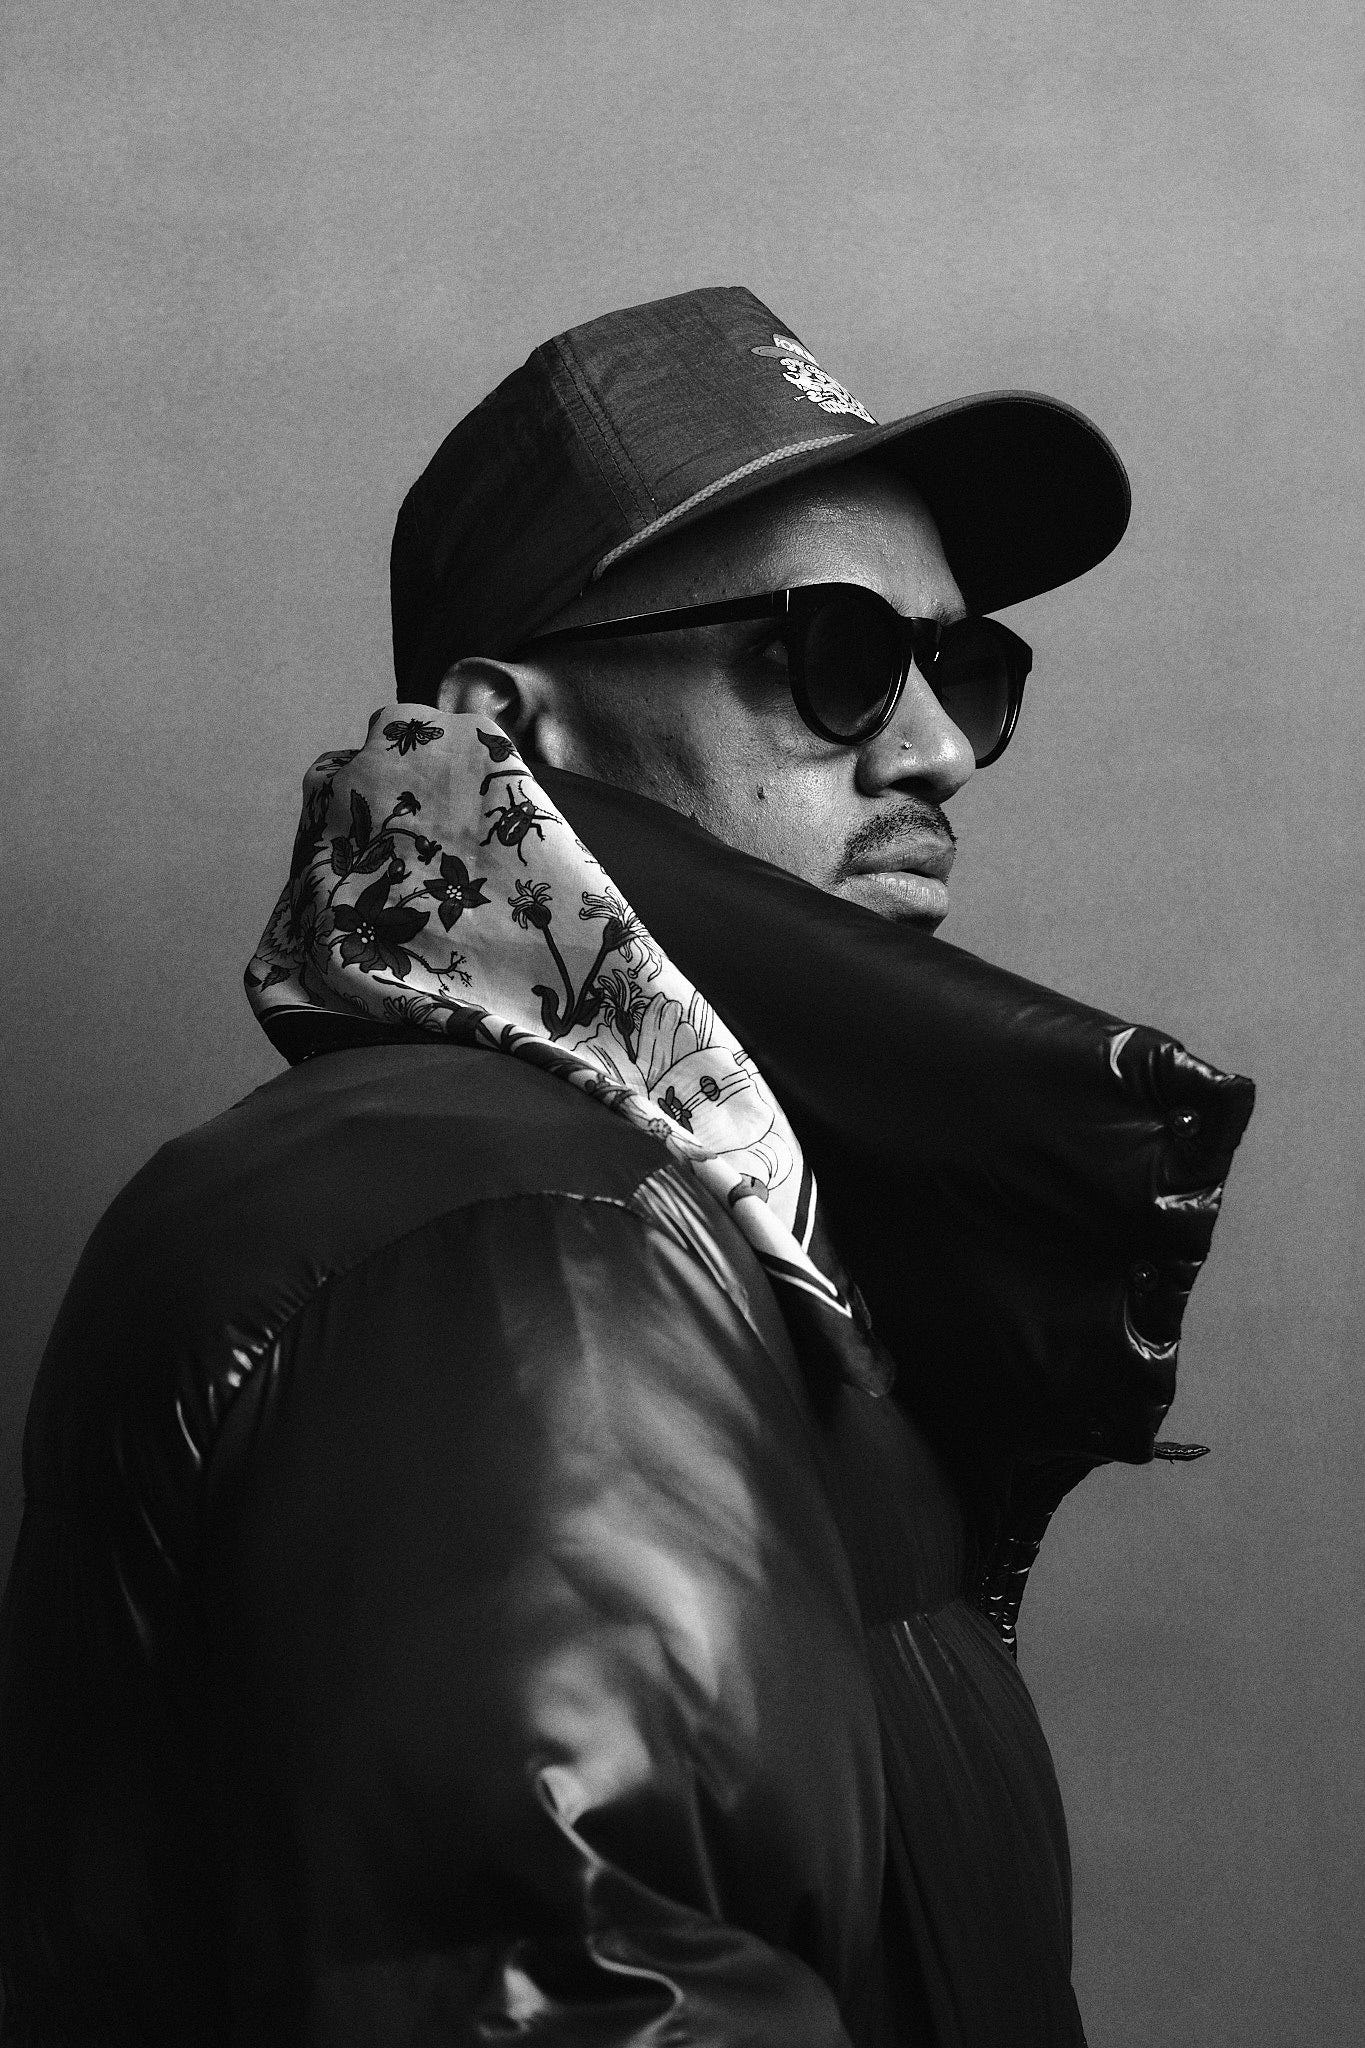
Take a look at the image below. You’ll notice the key light is coming from the right side of the frame and hitting the subject’s face. There’s also a fill light from the left, but at a lower power. That difference creates the contrast.
Creatively, I wanted this image shot at F8.0 to capture all the details in the face and accessories. After setting my camera shutter speed and ISO on the meter, I took a reading from the subject’s forehead which is lit by the key light. If the reading came back as F5.6, I would need to double the light’s output or bring it closer to reach F8.0. Why? Because creatively, I’m choosing to shoot at F8.0 and require this area to be exposed for F8.0, not F5.6.
Then, to shape the shadows, I decided that the right side should be one stop darker. I took another reading at the temple where the fill light hits. To create a one-stop difference, that reading should come in at F5.6. Since I’m still exposing the image at F8.0, this shadow side will now be one stop below ‘optimal’ exposure.
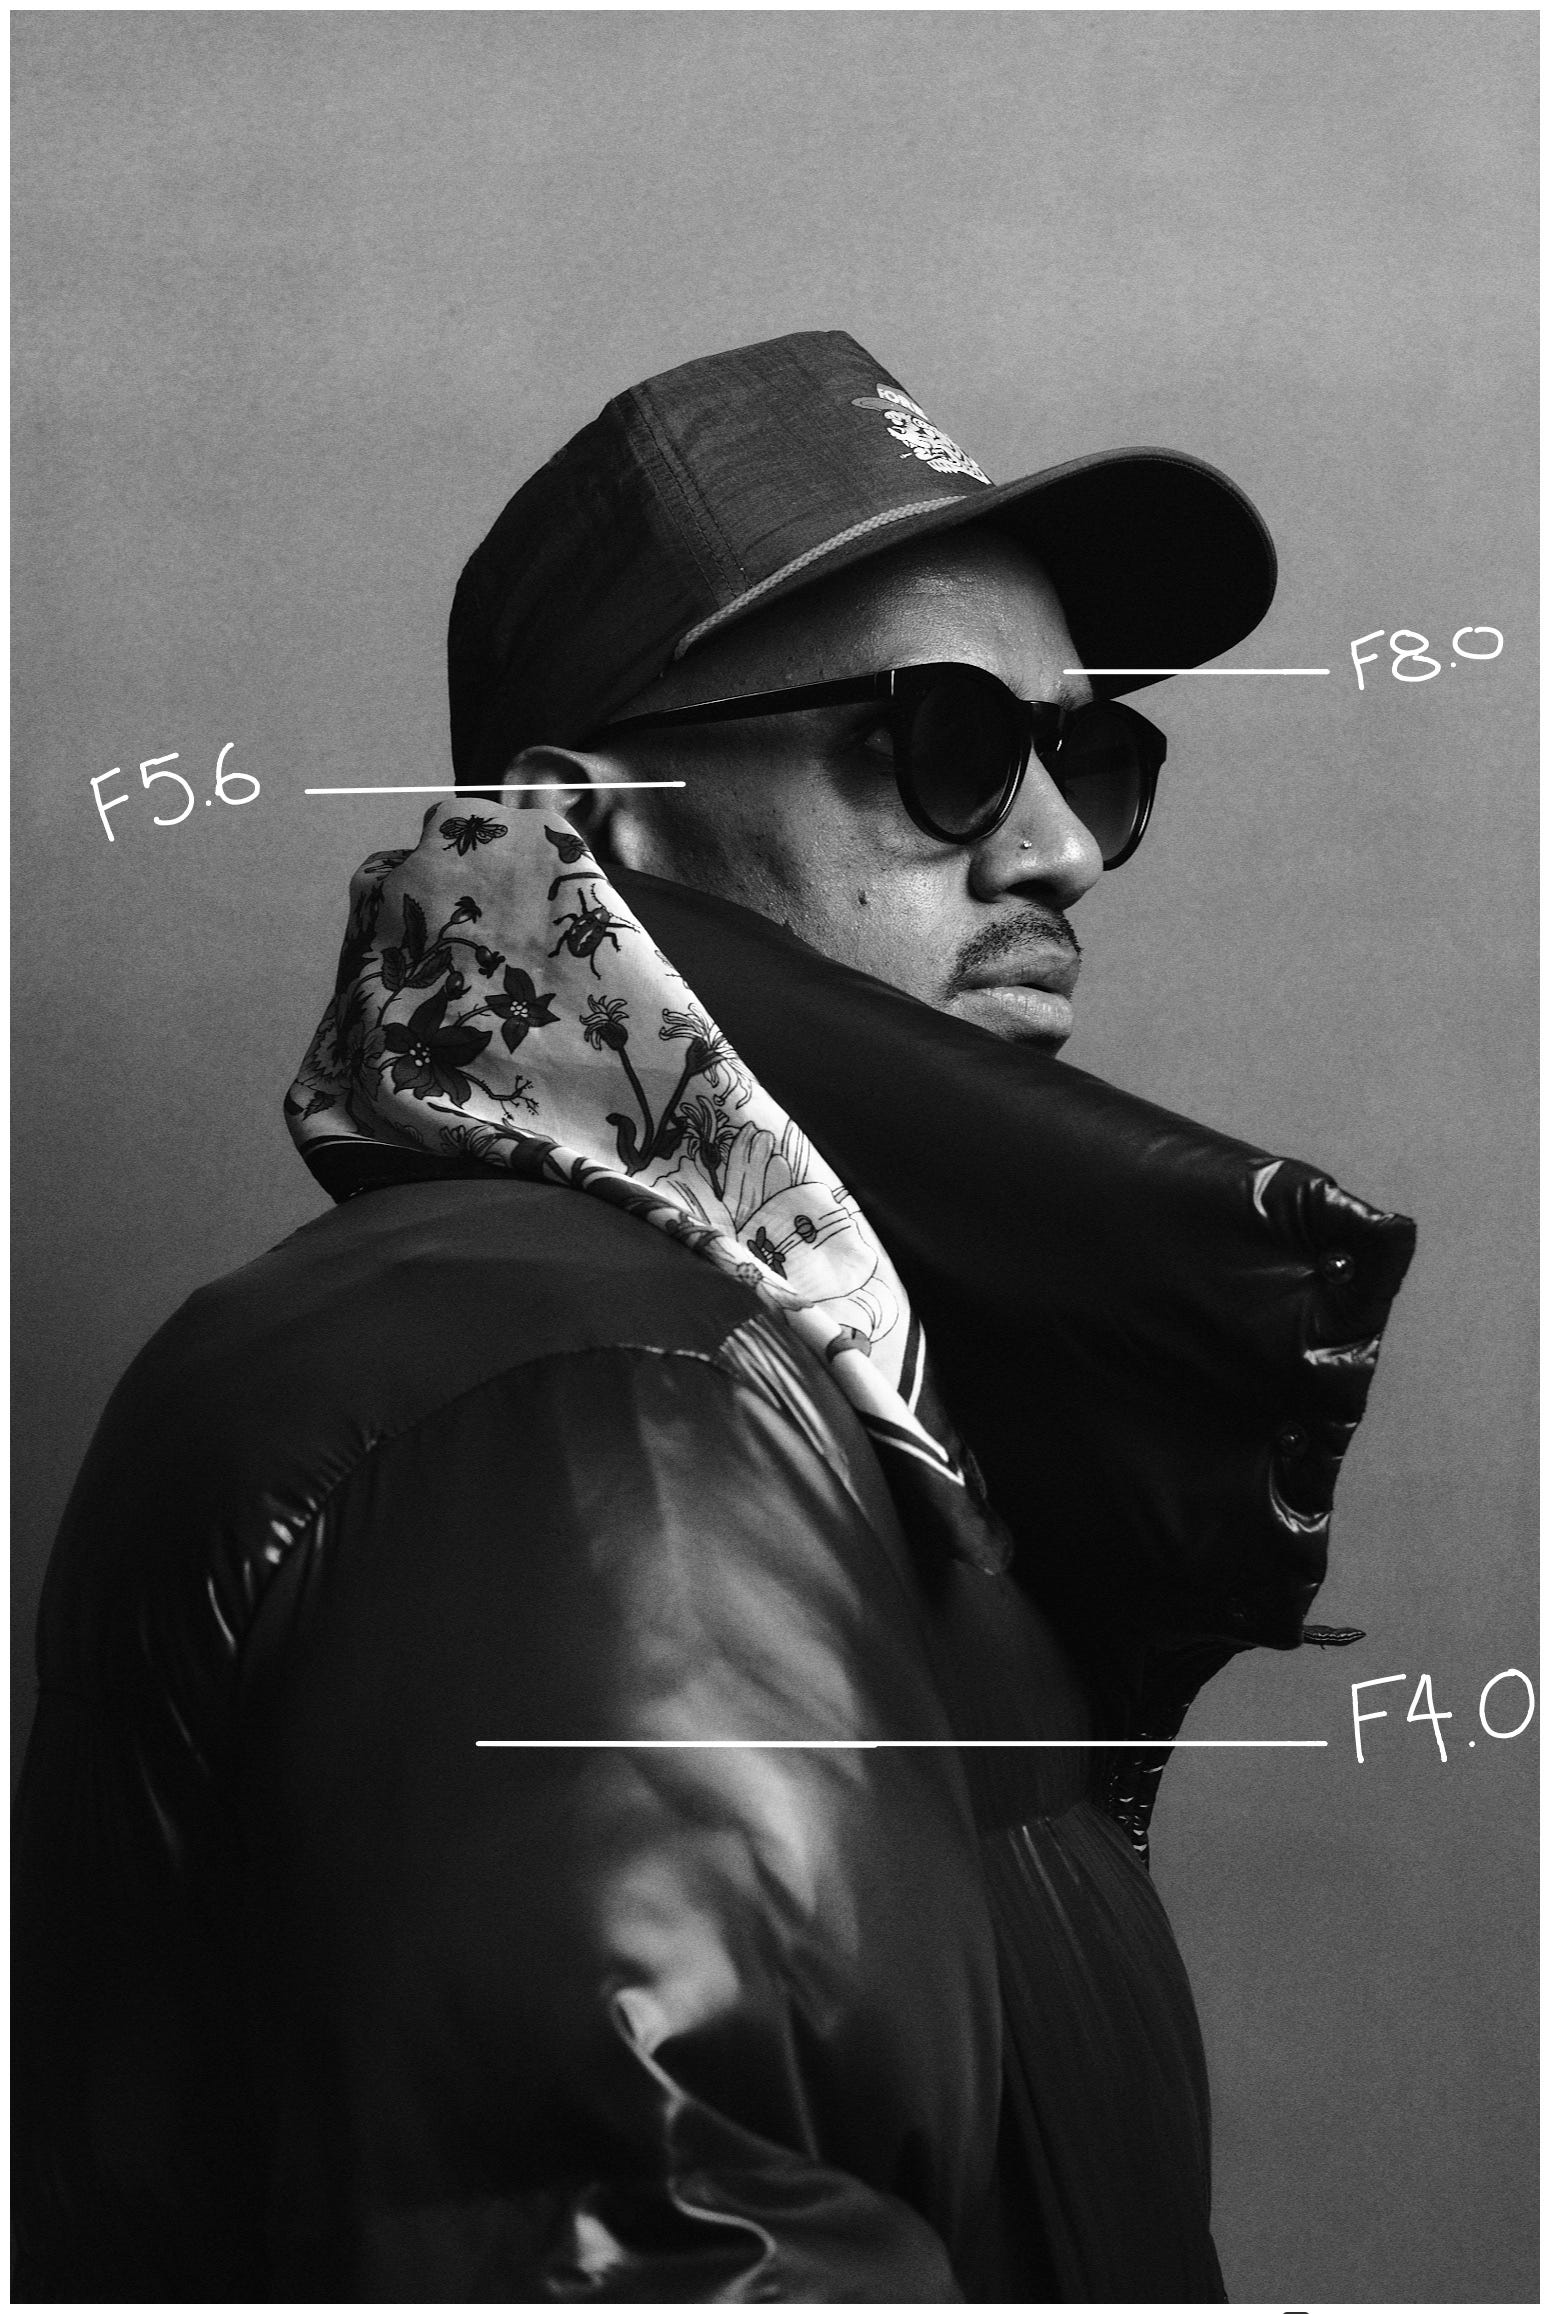
You can apply this method across the frame to design a full light recipe. In this image, the black puffer jacket is two stops darker than the key-lit area, meaning it’s four times darker. The background is about the same exposure as the key light, helping the jacket and accessories stand out. By combining a creative goal with a measured approach, I’m able to work quickly and with purpose.
This process might sound like a lot because… it is. Especially when you’re just starting off. But developing your understanding of light ratios takes the guesswork out of lighting. It improves your pre-production workflow and deepens your understanding of light. And with practice, you may even get to the point where you can eyeball exposure differences and ratios, which becomes a superpower on set.
Blending Art & Science
The overall understanding of light and light ratios seems to be slipping away faster than I ever expected. I’ve met professors and seasoned photographers who either don’t know and don’t care to know. And honestly, there’s a growing cynicism in the creative world that looks down on combining science with art. I find that incredibly stupid. To know and not care is one thing. To not know, and not care to know is just foolish.
This isn’t about drowning creativity in numbers. It’s about building fluency. Ignoring the science behind photography is like a chef relying only on taste. Sure, they could be good. They might even be prolific. But it’s hard to believe they wouldn’t be better with a foundational understanding of chemistry.
I don’t use light ratios in every shooting scenario. Sometimes, it’s just not practical. But learning them has sharpened my eye, improved my study of photography, and helped me work faster when the stakes are high. To put it more simply, it’s just about respect for the craft.
Upcoming Events & Workshops
Los Angeles: Leica Akademie: Video for Photographers
Next month, I’m leading a two-day workshop for photographers who are new to video. You’ll get a practical introduction to filmmaking using the Leica SL system, with a focus on branded content and visual storytelling. Lear more here.
In late September, I’m heading to India for a street photography adventure across the North and South. A few seats are still available for those looking for a deep, immersive photography experience. Learn more here.
Mexico City: Día de Muertos Meet-Up
Toronto Studio Photography Workshop
I’m developing a two-day studio workshop for late-November in Toronto covering my approach to planning, lighting, and delivering bold studio work. If you’re interested, email me to join the waitlist.
Arctic 2026 Photography Adventure
In 2024, I traveled to Svalbard with Quark Expeditions and it was unforgettable. I’m planning a return trip in 2026 with a group of photographers. This is not a workshop. It’s an excuse for like-minded storytellers to visit one of the most remote places on earth. If that sounds like you, fill out this form to learn more.
